Uploading & Managing Images ID: EBT-WWM-IMG
Proper image management is crucial to maintaining a quality, organized, and legal website. Managing images within Marketpath CMS is not a difficult endeavor if you follow our best practices guidelines.
Uploading Images
To upload one or more images, go to Content -> Images and the Images list dialog will open (Fig. 1).
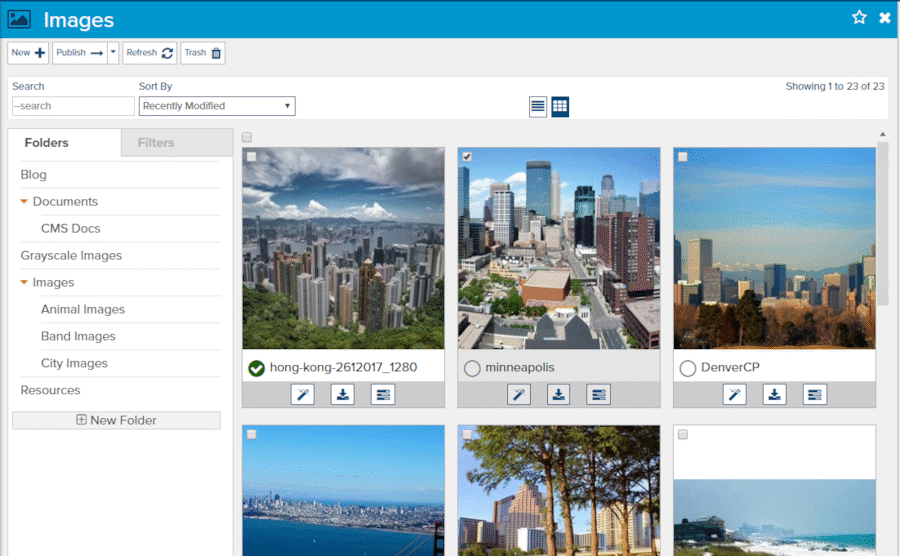
Fig. 1 - Images list dialog
Select one single folder to which you want the images uploaded. This is important, so make sure you only see one applied folder filter in the filters area (Fig. 2).

Fig. 2 - One applied folder filter
Next, select the New action at the top of the dialog. A dialog will open allowing you to select one or more images (Fig. 3 & Fig. 4). You will need to navigate to the proper folder on your computer to find the images you want uploaded.
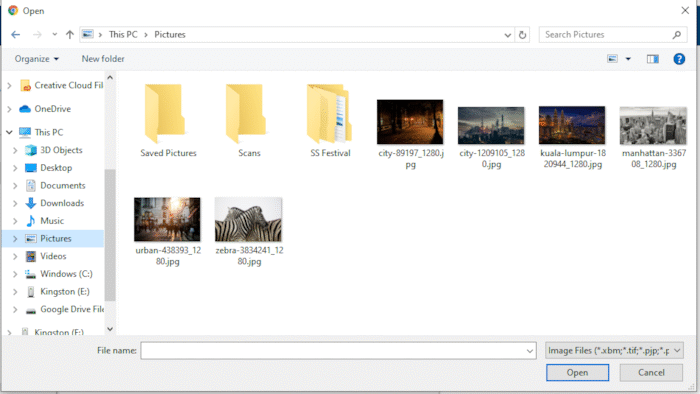
Fig. 3 - Local dialog to select an image on Windows
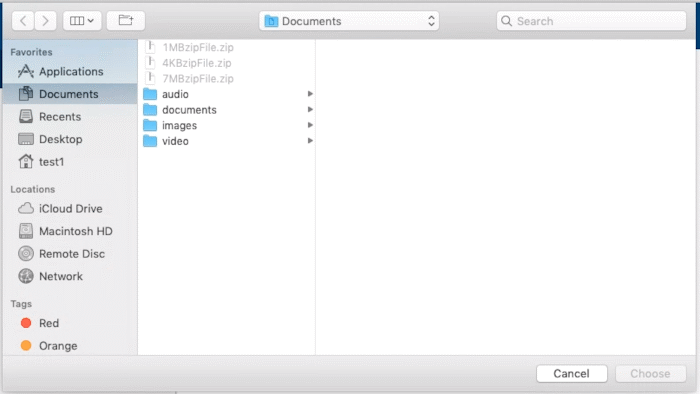
Fig. 4 - Local dialog to select an image on Mac
When you have navigated to the folder containing the image you want uploaded click on the appropriate image. If you want to upload multiple images at the same time, click each image while holding the CTRL button on Windows or the Command button on a Mac. Press Open when you have selected the appropriate images. You will see the upload dialog and a progress indicator for each image (Fig. 5). Once completed you will immediately see the new images in the image list.
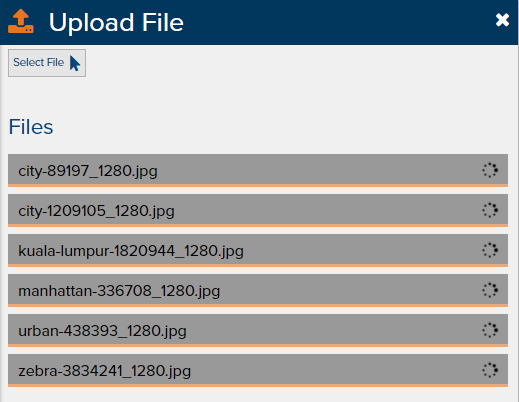
Fig. 5 - Upload progress indicator
Uploaded images are immediately published to the Live site. These and documents are the only two objects automatically published.
Organizing Images
Be sure to always select a folder for uploaded images prior to uploading them. Otherwise, you will have to open the Properties dialog for each image, select the folder, and then save and publish. Or, if no folder is selected you may end up with a vast collection of images all in one folder making one image difficult to find when you need it.
Image Alt
The image Alt value is critical for building an accessible website. The Alt value allows visually impaired visitors using screen readers the opportunity to understand what an image contains.
By default, we provide an Alt value for your images that is automatically applied when you insert images onto pages. This Alt value is the name of the image without the extension. If images have descriptive names then you may not have to change them, but if they have non-descriptive names, as images often do, we recommend you give them a useful Alt value.
For example, an uploaded image has the file name city-89197_1280.jpg. The Alt value then becomes city-89197_1280. This is not helpful or descriptive. In this case, the Alt value should be changed to something like “City Street at Night”.
To update the Alt tag, click the Properties icon ![]() to open the Image Properties dialog (Fig. 6). Update the Alt tag with a descriptive value and then click Save and Publish.
to open the Image Properties dialog (Fig. 6). Update the Alt tag with a descriptive value and then click Save and Publish.
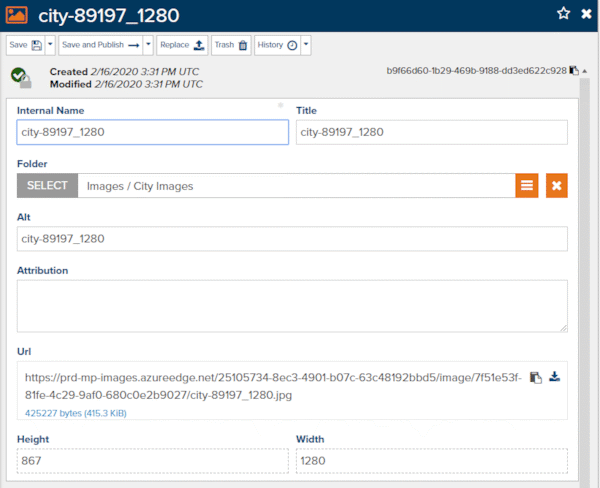
Fig. 6 - Image Properties dialog
The value you use for the Alt tag will now be used when you insert the image in an HTML editor content area or other places the image may be used. If you have already inserted this image into an HTML editor content area then that Alt value will not be updated. You will need to update it manually.
Image Rights Attribution & Licensing
Avoid using images you do not own or for which you do not have proper licensing. Receiving demands for image royalties can be stressful and costly. It’s important to keep track of an image’s origin by using the Attribution field for each image. This field is not auto-filled.
You can use your own format for the Attribution field. However, we recommend providing information that lets you know where an image came from if you ever need to lookup licensing details.
Images downloaded from miscellaneous websites, such as a Google images search, is NOT recommended. Instead, find a reliable image repository where the copyrights are clearly labelled.
istockphoto.com and shutterstock are reputable image sources but require a licensing fee. For these images, we recommend providing the URL to the original image as the Attribution value.
There are also many royalty-free sites with free images, such as pixabay.com, pexels.com, and pixnio.com. Attribution to these images may vary so pay attention to the licensing of each. You may have to provide a link back to the source or give attribution to the photographer. And some may require displaying the source and photographer in a visible image caption.
Replacing an Image
On occasion, you may want to replace an image with an updated version. When this happens, you can use the Replace action in the Image Properties dialog (Fig. 7).
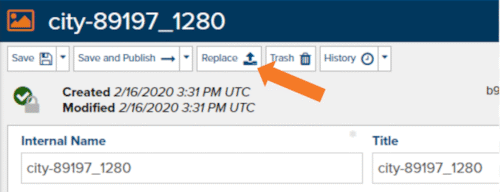
Fig. 7 - Replace image action
To replace an image, click the Replace button and a confirmation dialog will appear (Fig. 8).
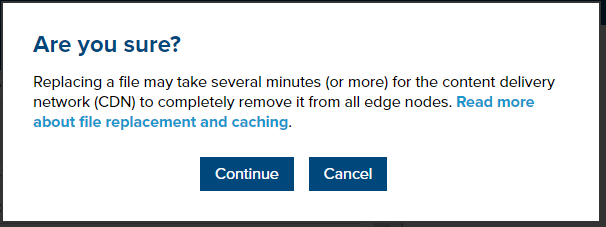
Fig. 8 - Replace image confirmation dialog
Click Continue and select the new image from your computer. This operation usually takes several minutes before the new image appears but it could take longer. There are several mechanisms between your computer and the image that could delay the update even more.
Your Internet browser, such as Google Chrome, Internet Explorer, Microsoft Edge, Firefox, or Safari, will cache images locally for a period of time. You can usually force the browser to ignore the cached version and download the image again by press CTRL-R or Command-R. This is a forced refresh and will download all elements for the page you’re viewing.
All images in Marketpath CMS have two physical locations. The first is called Blob storage where the original image resides. This is updated immediately during a replace operation. The second location is with the CDN (Content Delivery Network). This is where all the variations of an image are stored for fast lookup.
For example, you may have a thumbnail size and a large size of an image. Both versions are stored (or cached) at the CDN which has nodes all over the world for the fastest geographic lookup. Clearing all of these nodes may take several minutes.
The other mechanism that may affect a smaller fraction of users is caching with a proxy server. There are many names and purposes of this type of server. It may also be called a cache server or a network security appliance. Regardless of the name, it is a service that sits between your Internet browser and everything on the Internet. In many cases, these provide caching of Internet content to reduce the overall bandwidth usage of an office or campus. There isn’t much you can do about this device but simply understand it may be a factor for why you don’t see your new image. Caching times can vary dramatically for these.
Feedback?
Please fill out the form below with your feedback or any questions you may have after working through the "Uploading & Managing Images" lesson.