Automation Setup in Marketpath CMS ID: DBT-AUTO-ZAP
NOTE: In order to use Marketpath CMS Automation features your site's plan should be one of the following: Plus, Pro, or Enterprise. To see what plan your site currently uses, go to Site -> Site Administration -> Billing Details.
The example below walks you through setting up automation that sends a thank you email to the website visitor who submitted a contact form.
Setup a New API User
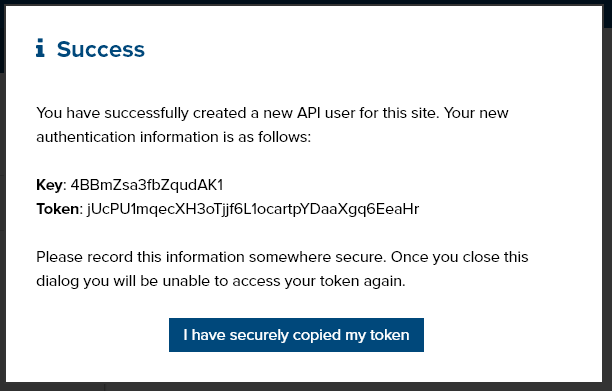
Marketpath CMS integration with Zapier requires an API user. This is a special user type that can be used to make API connections to Marketpath CMS. To create an API user, go to Site -> Site Administration -> API Users and click New API User. After the new API user is created you will see a dialog with the API key and token. Be sure to securely save these because you cannot retrieve them after this step. We recommend leaving the key and token dialog open until you add these values to your Zapier account.
Create Zapier Account
If you have not already created a Zapier account visit the sign up page and create your account. If you already have an account visit the Marketpath CMS invitation link to use Marketpath CMS. It is currently a private app so you'll need that link to access it. Be sure to click the Accept Invite & Build a Zap button.
Creating Your First Zap
Create a Trigger
Once you've logged in, click the Make a Zap button. This section will walk you through creating a trigger based on a new form submission in Marketpath CMS.

Give your Zap a friendly, understandable name.

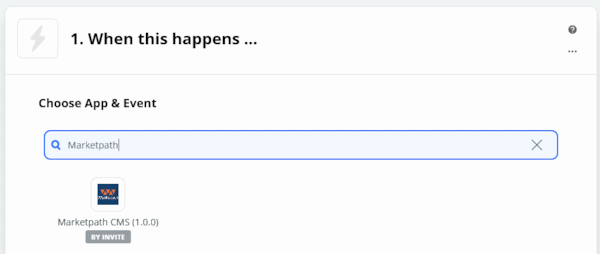
In the Choose App & Event section, type "Marketpath" and click on the Marketpath CMS (1.0.0) result.
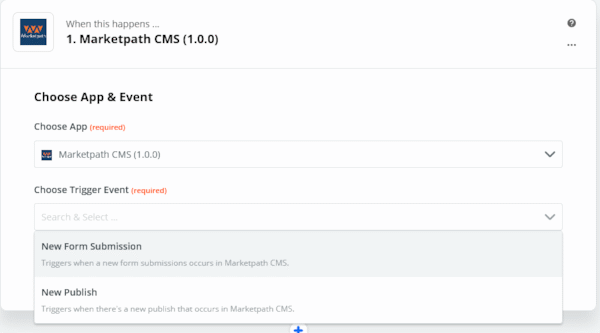
Now choose a trigger event by selecting New Form Submission and then press Continue.
If this is your first Zap using your Marketpath CMS account it will ask you to Sign in to Marketpath CMS. Click the blue sign-in button and provide the API User key and token created in the first step above.
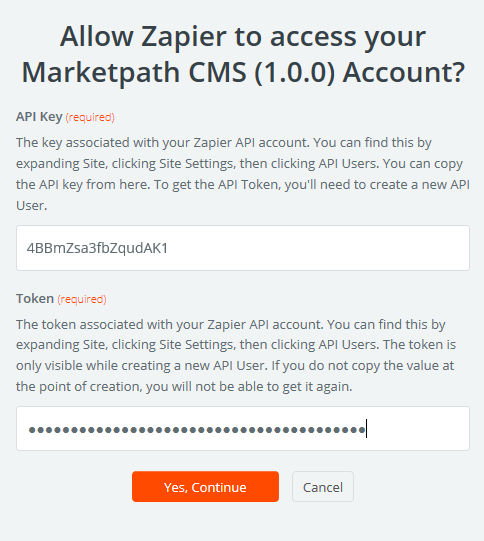
If successful, click Continue.
Next, select the form you want to use with this Zap and press Continue. Note: if you add fields to this form after the Zap is created, you may need to refresh this step to pull in the new fields.
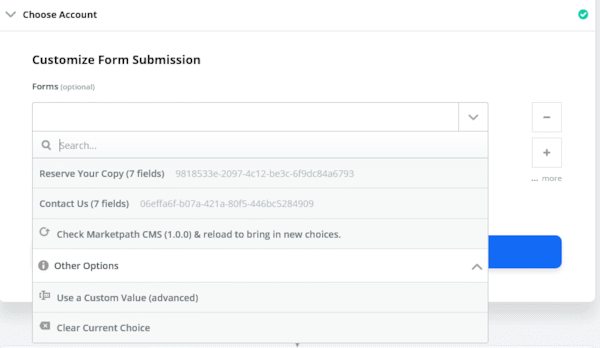
Click Test & Continue. You are completed with the trigger setup.
Create an Action
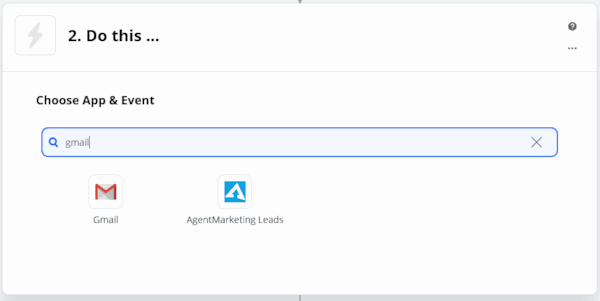
In the Choose App & Event field, type the name of your email provider. We use Gmail so that's what I'll select here. If your email provider isn't listed you can try using Email by Zapier which should allow you to send an outbound email.
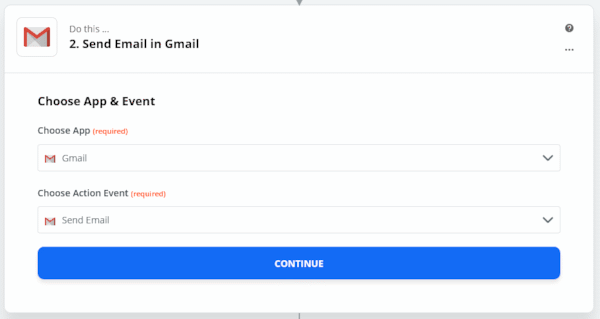
For Choose Action Event, select Send Email. Then press Continue.
The following step will ask you to Choose an Account. If you already have your Gmail account setup in this Zapier account, choose it. Otherwise, click Sign in to Gmail and follow the directions to authenticate your Gmail account. Once authenticated, click Continue.
Next, you'll customize the email you want to send. Each email app may provide a different set of fields for you to edit.
In the To field, click the pluls icon next to the field and select the Email field.
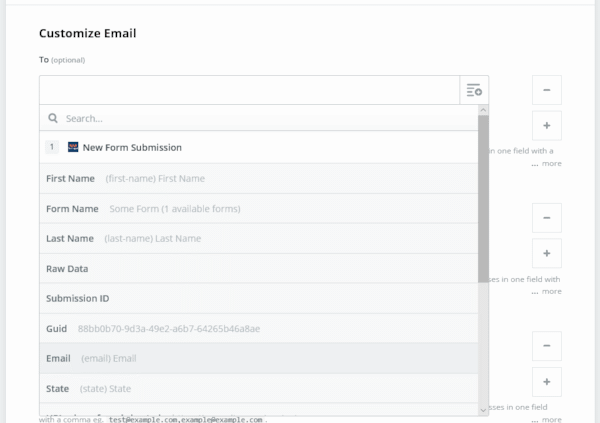
The To field will appear like below once the form Email field has been selected.

Next fill in the From field or select your email address from the drop down menu. I'd recommend using your primary account email to avoid deliverability issues.

Then provide a friendly From Name. This can be your company name or your own name.

Provide a value for the Subject field.

Then add content to the Body. Here you'll want to use some of the fields from the form submission to personalize the email. You can add form fields by clicking the plus icon and choosing the appropriate fields.

There are other fields you can use, such as adding an attachment. I recommend playing around with these fields through form submission tests to see what you feel works best. When you've completed updating field values, click Continue.
The next step will ask you to Test & Review or Test & Continue. It's likely this will throw an error since you're using a placeholder value for the To field and not an actual email address. The workaround is to simply click SKIP TEST.
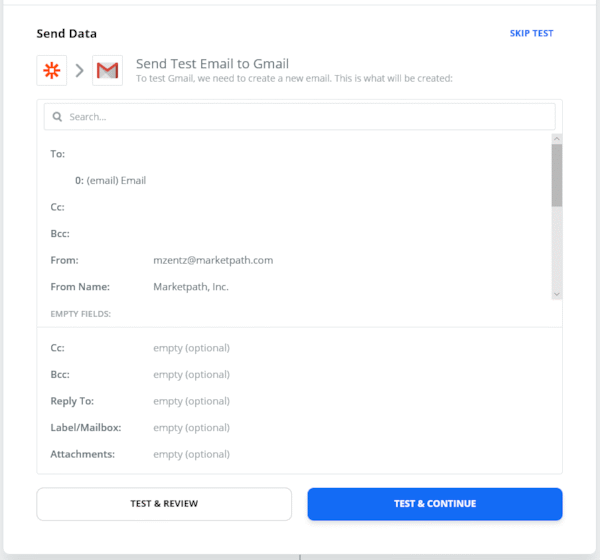
After clicking Skip Test you'll see a popup appear at the bottom of the screen with an ON/OFF toggle. Click the toggle to turn your zap on.

Click the toggle just once and Zapier will get the Zap ready for action. When ready, you'll see the green On button appear at the top right of the screen.
Testing
Now you need to go and test your new form submission automation. Visit the form on your website and send a couple test submissions using your own email address. You should receive a new message for the email you submitted. Also, if you look at the history of your Zap you should see the events logged like the below.

You can click on each log entry to see the details of the form submission, including input data and output data. If there is an error, then you'll see a reason for that error.
You can also look at the automation log in Marketpath CMS by going to Site -> Automation and clicking on the Atom you just created. Atom is is short for automaton, a self operating machine. One atom is created for each Zap you create. If you click on the properties, you'll see an editable name and a Logs button. These are generically named so you may want to change the name to something more easily identifiable.
You can also Deactivate and Activate an atom. If an atom is deactivated, the Zap will not be triggered and subsequent actions will not be executed.
Final Thoughts
You can achieve a great deal of automation with the Marketpath CMS and Zapier integration. For now, you have to use the Marketpath CMS invitation link. If not, you will not find Marketpath CMS as an available app. We have to reach a certain threshold of usage before Zapier makes our app public. We hope you can help!
Of course, if you need any assistance, please submit a support ticket or give us a call at 800-657-7786.
Feedback?
Please fill out the form below with your feedback or any questions you may have after working through the "Automation Setup in Marketpath CMS" lesson.