Editing Menus & Site Navigation ID: EBT-CEPC-EMSN
Marketpath CMS sites typically have some sort of site navigation, often at the top of a page and sometimes displayed in the footer. We call navigational items Menus and Menu Items and each can be managed by you within Marketpath CMS.
Here is an example (fig. 1) of a site using two Menus on their site. The top Menu consists of Contact and Search. The lower menu consists of the more important navigational items, Services, Solutions, Industries, Products, etc.

Figure 1 - Example of two menus on a site
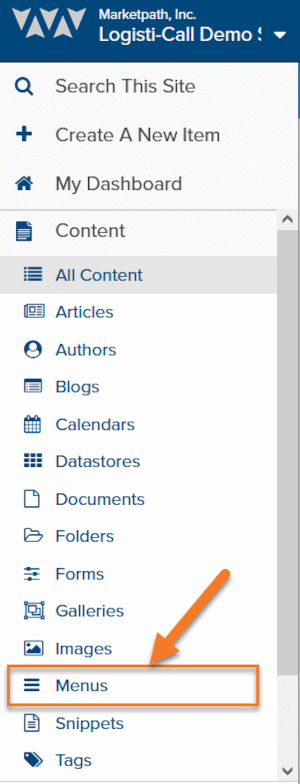
In Marketpath CMS, these menus are managed by navigating to Content -> Menus in the Marketpath CMS primary navigation (fig. 2).

Figure 2 - Accessing Menus
The Menus dialog will open and show you each Menu on your site (fig 3). Click the Browse icon (right-facing arrow) of the menu you want to edit.

Figure 3 - Menu list dialog
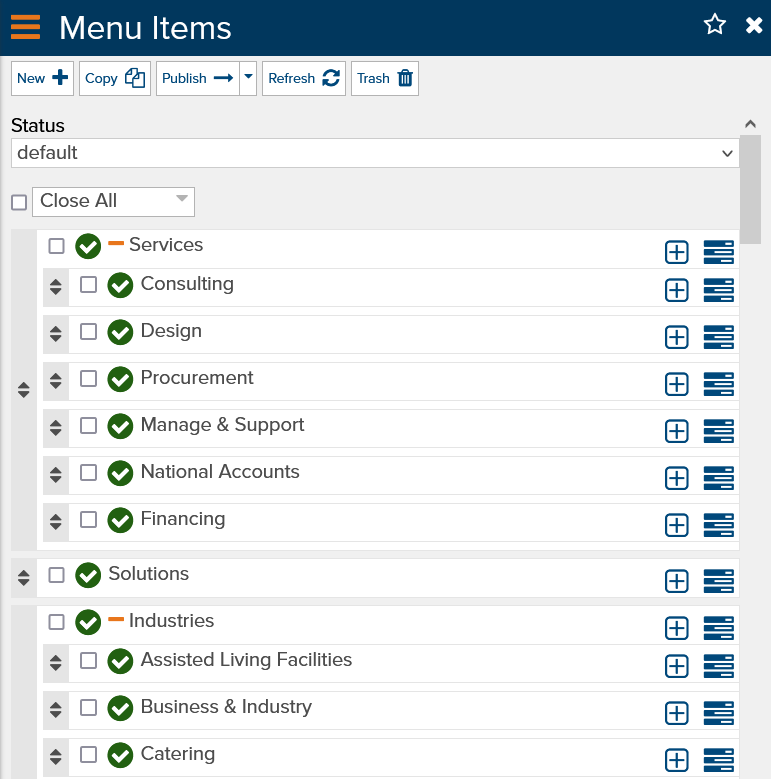
This will open the Menu Items dialog (fig 4).

Figure 4 - Menu Items dialog
Here you will see a treeview of all menu items and their child items. Typically, on your website, the child items are shown when you hover over a top level item. In the list below, the visible top level items are Services, Solutions, and Industries.
Create New Menu Items
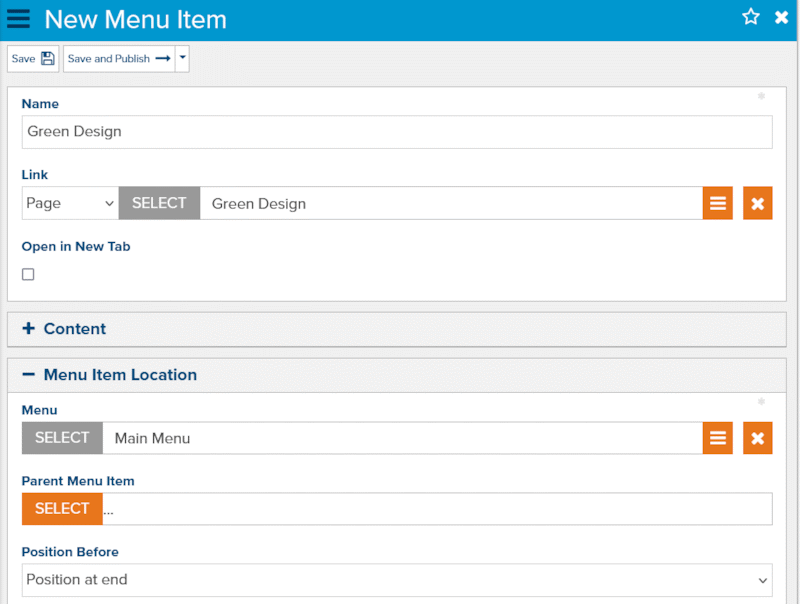
To create a new top-level (or root level) menu item, simply click the New button at the top of the dialog. You’ll be shown the following New Menu Item screen (fig 5).

Figure 5 - Create a new Menu Item
Provide a Name for the Menu Item and then choose a link. Typically, you’ll want to link to a Page within your website but sometimes you may want to link to a custom external URL.
You can also select a Parent Menu Item if you want this new item to appear under that selected item.
And finally, you can choose where to position the new item amongst the other existing items. This can also be done after creation by dragging and dropping it to the position you want.
NOTE: We recommend you avoid linking directly to Documents or external sites if you can avoid it. The reason is that when visitors are using your navigation, they are expecting to go to a page on your site, not opening a new tab for a document or an unknown website.
Create Child Menu Items (sub-items)
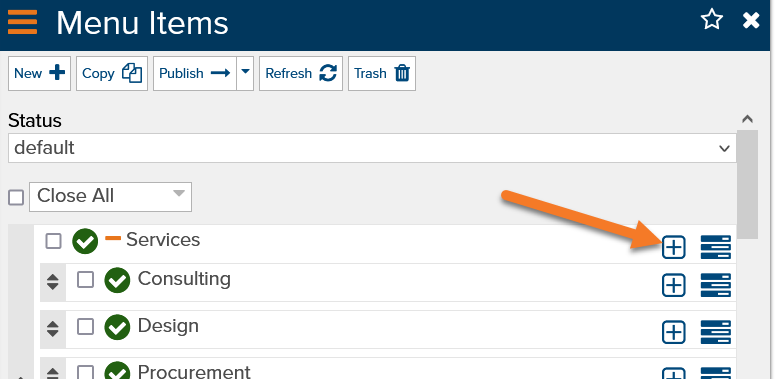
Another way to create child items is to click on the plus icon adjacent to the parent item. In Figure 6 below, if I click on the plus icon next to Services, a New Menu Item dialog will open with the Parent Menu Item already selected.

Figure 6 - Create a child menu item
Update Menu Items
You can update menu items by clicking the Properties icon (next to the Plus). This will open the Menu Item edit dialog and allow you to change the name or the link to which it takes visitors when clicked.
Trash Menu Items
To delete one or more menu items, click the checkbox next to each and then click the Trash button.
Feedback?
Please fill out the form below with your feedback or any questions you may have after working through the "Editing Menus & Site Navigation" lesson.