Navigation Overview ID: EBT-GS-NAV
Selecting a Site
When you first log into Marketpath CMS you’ll be presented with one of three versions of the site navigation. If you only have access to one site, Marketpath CMS will automatically open the site and show the account and site name at the top left (Fig. 1)

Fig. 1 - Access to single site
If you have access to more than one site, you'll need to click Select a site (Figure 2) in the top left corner and use the site selector to locate your site (Figure 3).

Figure 2 - Multiple sites on first login
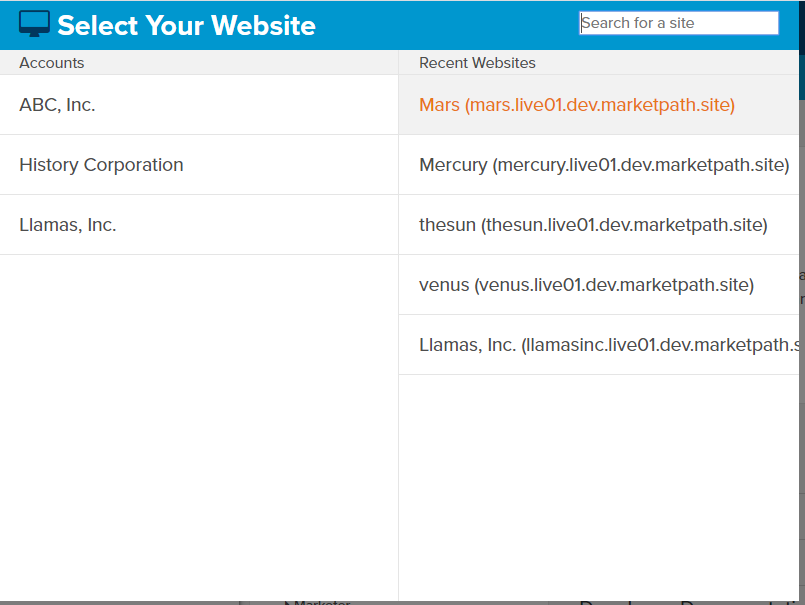
Figure 3 - Site selector
If you’ve already logged in and worked on a site, the last site you worked on will be automatically opened so you can continue working on it.
You can select a different site by clicking the Site drop down arrow at the top left and then do one (or a combination) of the following:
- If this is not your first visit, select your site from the Recent Websites list.
- Type the site name, domain name, or account name into the “Search for a site” text box. The list will be filtered based on what you type. Then you can select the site accordingly
- Click on an account in the Accounts column on the left side of the site selector. This will show all sites associated with that account.
Primary Site Navigation
By default, after a site is selected, all users will see the following clickable navigation items (Figure 4).
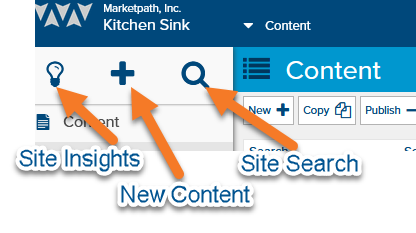
Figure 4 - Default primary navigation
- Search This Site - allows you to search for keywords across all object types in the site.
- Create A New Item - allows you to create a new object
- My Dashboard - shows the main Marketpath CMS dashboard. Currently this contains information about the latest release, a link to the training & support site, and a link to create a new site.
- Content - This is the group container for most editable content types throughout the site. Most editors will spend the majority of their time in this section.
There are two other group containers not shown by default. We recommend avoiding these areas unless you are familiar with developing and managing websites.
- Develop - contains links for templates, scripts, stylesheets, custom sites settings, and image presets.
- Site - contains links for site settings, trash, redirects, error pages, imports and exports.
At the top right corner of the screen, you can also see icons for User settings, advanced settings, and help (Figure 5). Just click each icon to show the corresponding drop down menu.

Figure 5 - Settings & support navigation
Customizing Navigation
With Marketpath CMS, you can choose to show and hide only the items you need, creating a cleaner, more manageable environment. You can always get to the other items with an extra click but they stay hidden until you need them.
To see all menu items, click Full Menu (Figure 6). You can click on any of these items to directly open their corresponding dialogs.
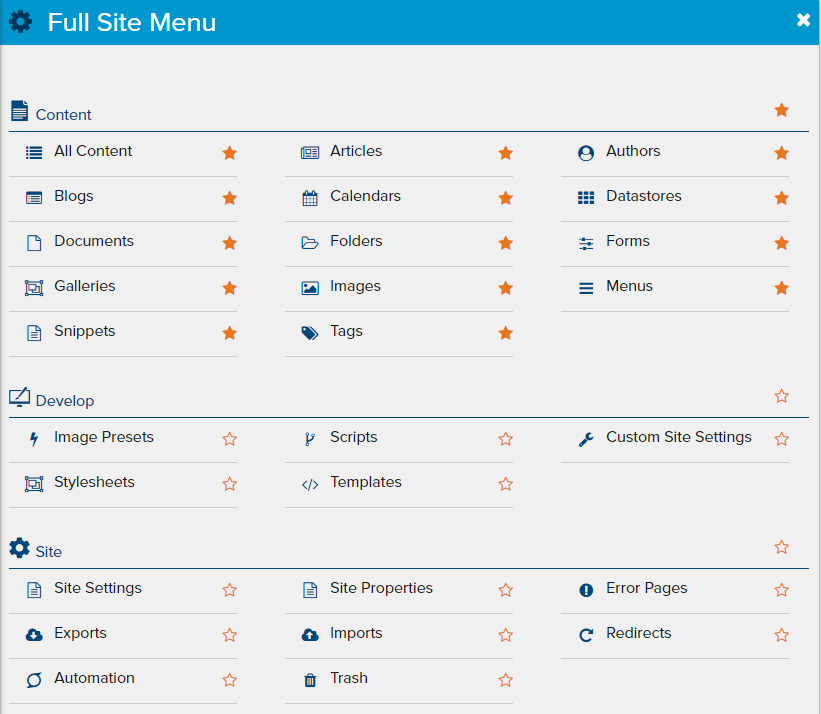
Figure 6 - Full Site Menu
To show or hide any navigational item, click the star icon next to it. A solid orange star means the item will be shown in navigation. An empty star means it will not be shown. You can also show and hide the entire Content, Develop, or Site groups by clicking the star icon for those sections.
Shortcuts
Marketpath CMS gives you the ability to create shortcuts for common navigational items and certain actions. A shortcut is like a bookmark (or favorite) used in web browsers like Microsoft Edge or Google Chrome. When you click the bookmark, it takes you directly to the saved web page. It’s similar for Marketpath CMS shortcuts. They take you directly to the dialog referenced in the shortcut. The biggest difference is that Marketpath CMS shortcuts can also contain default data and selections, reducing the clicks needed to accomplish common tasks.
By default, your site should not have any shortcuts, unless another user shared one or more with you.
To create a shortcut, click the star icon (just once) in the top right corner of the dialog for which you want to create the shortcut (Figure 7).
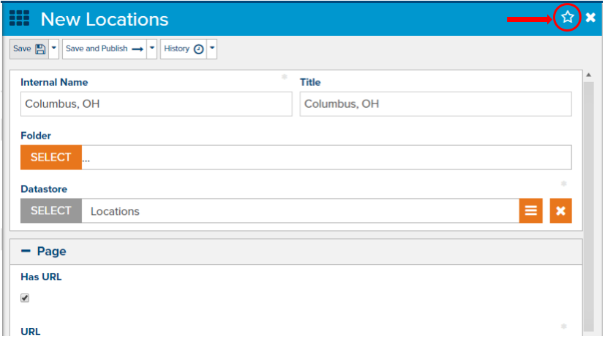
Figure 7 - Creating a shortcut
This will add a new shortcut at the bottom of your primary navigation (Figure 8). In this example, the name of the Datastore is Locations, so the shortcut was named New Locations.
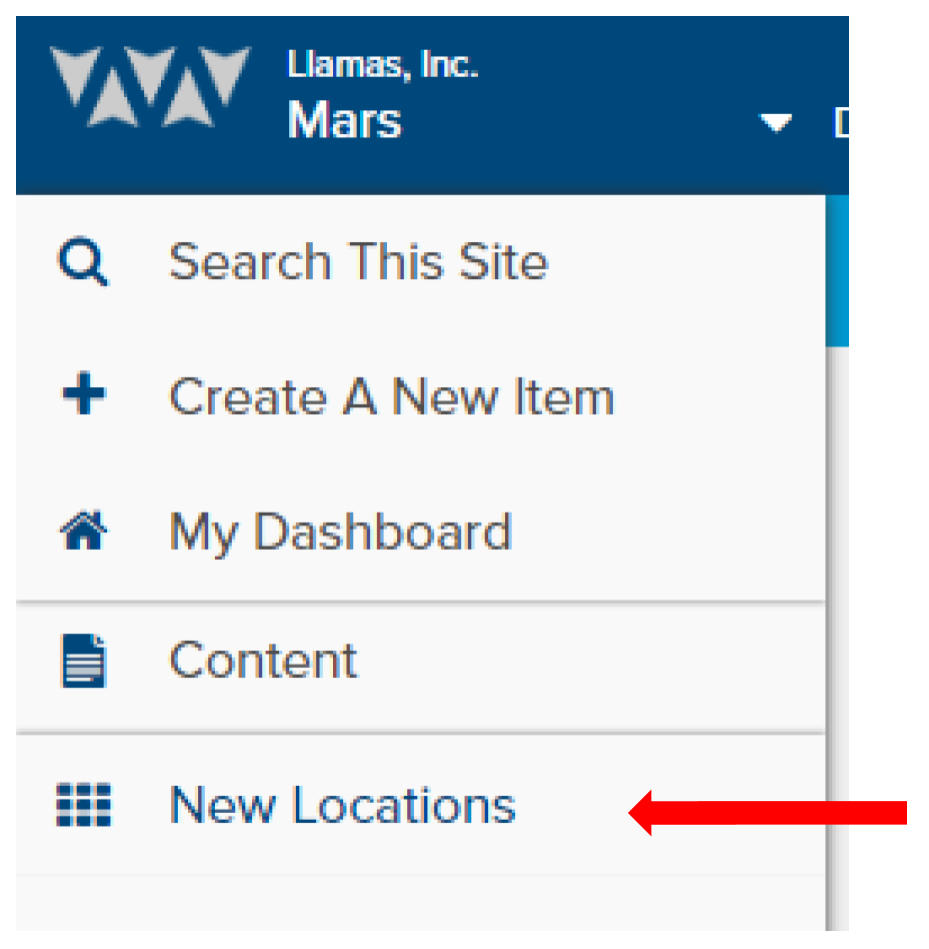
Figure 8 - New shortcut
You can rename shortcuts, change their background color and icon, and share them with other site users. When you mouseover a shortcut, you'll see three vertical dots appear. Click on those dots and you'll see four options (Figure 9).
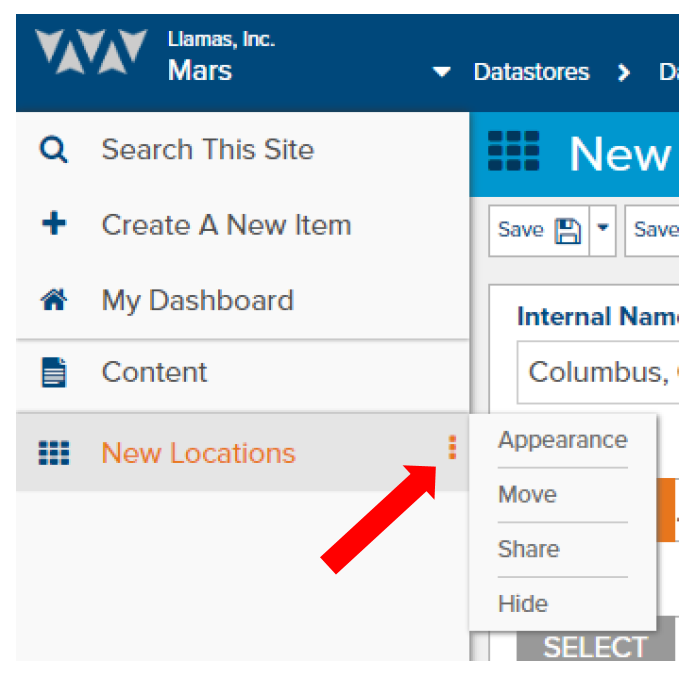
Figure 9 - Shortcut actions
Click Appearance to change the name, background color, or icon. When you're done making changes, click the green arrow next to the name field (Figure 10). This will save it.
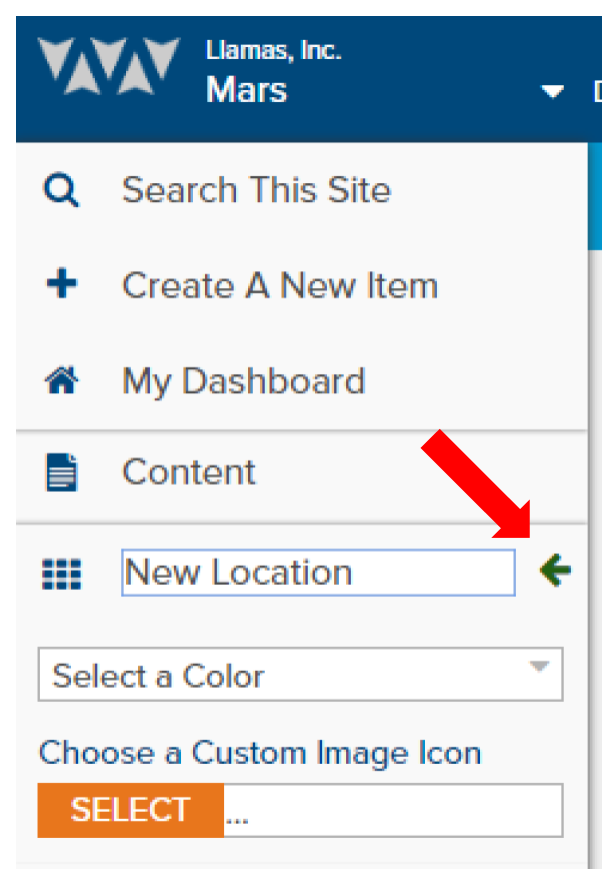
Figure 10 - Save shortcut changes
You can also share the shortcut by clicking the Share action on the shortcut dropdown menu. This will then show a green button that says Share with all site users (Figure 11). All users that access the site will automatically see this shortcut in their list of shortcuts. They may choose to use it or hide it which will only hide it for themselves.
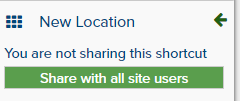
Figure 11 - Shortcut sharing
To unshare, follow the same steps as you would to share the shortcut but, instead, click the Stop sharing button (Figure 11). Keep in mind, this only stops sharing it for future users who access the site. It will not remove it from users who have already had it added to their shortcut list.
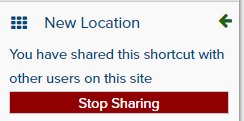
Figure 12 - Stop sharing a shortcut
To move a shortcut, choose the Move option and use the up and down arrows to move the option to a new location. Click the green arrow when complete (Figure 13).
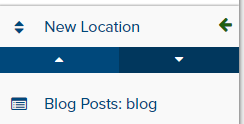
Figure 13 - Moving a shortcut
To delete a shortcut from your list of shortcuts, you'll need to open the Full Menu. This is different than hiding the shortcut. Hiding a shortcut will only hide it in the navigation but the shortcut will still appear in your shortcuts list in Full Menu. To delete a shortcut, mouseover the shortcut you want to delete and click the delete icon (Figure 14).

Figure 14 - Deleting a shortcut
If you are working on a smaller screen with a limited work area you can collapse the primary navigation by clicking the left arrow at the bottom of the pane (Figure 15). Alternatively, you can expand the menu by either clicking on a group container (i.e. Content, Develop, or Site) or by clicking the right arrow in the collapsed navigation pane.
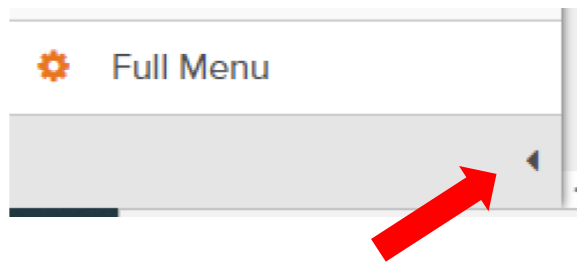
Figure 15 - Collapse primary navigation
Feedback?
Please fill out the form below with your feedback or any questions you may have after working through the "Navigation Overview" lesson.