Inserting Images ID: EBT-EDIT-IMG
Marketpath CMS provides advanced image management without requiring advanced technical knowledge. Every image inserted into the HTML editor is resized appropriately, on the fly, and cached with the CDN for faster downloading.
Inserting an Image
To insert an image, click the Image toolbar button ![]() and the Insert Image dialog will appear (Fig. 1).
and the Insert Image dialog will appear (Fig. 1).
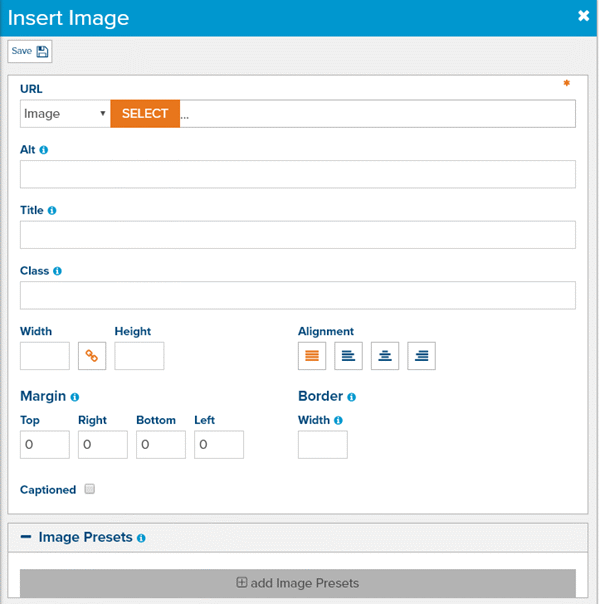
Fig. 1 - Insert Image dialog
Here you have three options: 1) select an existing image that you’ve already uploaded to Marketpath CMS; 2) upload a new image; or 3) link to an external image by URL.
Insert an Existing Image
To select an existing image, click the SELECT button (Fig. 2) and find the image you want to insert from the Select an Image dialog that opens.

Fig. 2 - Insert Image select button
Upload and Select a New Image
You also have the option to upload a new image and select it to insert into the HTML editor. To do this, click the SELECT button (Fig. 2) to open the Select an Image dialog. Pay attention to the next step because it will help you keep your images organized.
Select a Folder in the Folders tab where you want the image to be saved. A folder selection isn’t required but is recommended. Be sure to only select one Folder. When you upload a new image, this is where the image will be saved. If you want to create a new folder or sub-folder, click New Folder or move your mouse over the parent folder, click the three dots, and then click New SubFolder (Fig. 3). When the new folder is created, click on it. If you created a SubFolder you may need to expand the parent folder to see it.
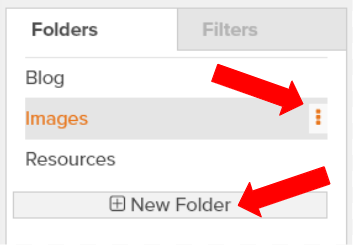
Fig. 3 - New folder
You will see the folder selection appear in the filters list (Fig. 4).
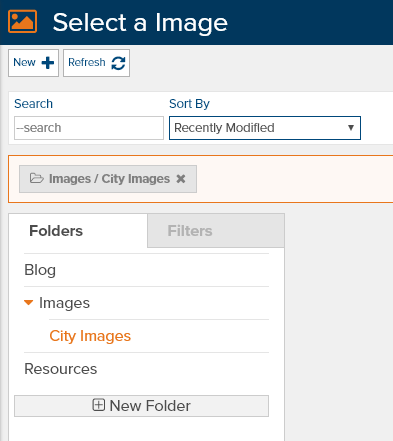
Fig. 4 - One selected folder before uploading a new image
Next, click the New button (Fig. 5). The Upload File dialog will appear and should open a file browser so you can select the image from the proper location on your computer. Select the Image to upload.
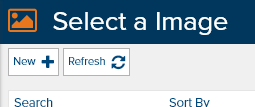
Fig. 5 - Select an Image New button
Once the new image has been uploaded you will see it in your images list. Select it.
Link to an External Image
To link to an external image by URL, select Custom on the URL drop down field (Fig. 6).
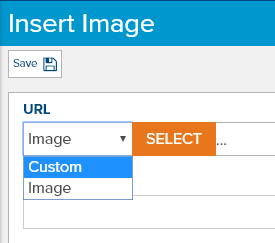
Fig. 6 - Insert Custom image
The SELECT field will change to a regular text box where you can paste the image URL (Fig. 7).

Fig. 7 - Custom external image with URL
NOTE: We don’t recommend linking to external images unless it is unavoidable due to copyright concerns. External images are less reliable and the path to them can change, leaving your site with a broken image. If you have the license to download the image and add it to your Marketpath CMS image library, then we recommend doing that instead of linking to it.
Setting Image Properties
Once you have the image selected you will see its name in the Select field, as well as an Alt tag, Title Tag, and its height and width (Fig. 8).
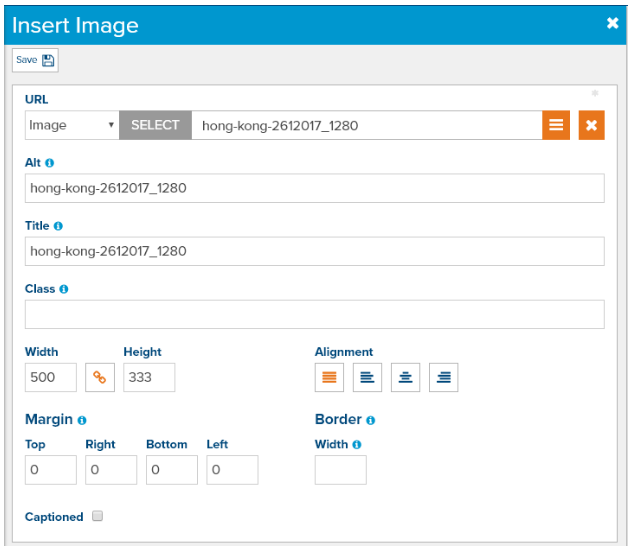
Fig. 8 - Image properties auto-populated after image selection
After you’ve adjusted the image properties click Save to insert the image into the HTML editor. You can always edit the image properties after inserting it by double-clicking on the image or clicking once to highlight it and then clicking the Image toolbar button.
Alt and Title Tags
It is recommended to change the Alt and Title tags to properly describe the image. The Alt tag is used primarily for search engines and screen readers for the visually impaired. The Title tag will show as a tooltip when a site visitor moves their mouse over it. We recommend you provide values to both of these fields to adhere to Website Accesibility rules of the ADA and to benefit your SEO strategy.
Width & Height
You can change the width and height of the image by altering the values in each field, stored as total pixels. A pixel is a unit of measurement for digital images. As you change one value the other will automatically adjust to maintain the image’s proper ratio. Under most circumstances you do not want your image’s width to exceed 1,000 pixels. You may need to try several sizes to get the size you want.
Once the image has been inserted into the HTML editor you can click the bottom right hand corner (Fig. 9), hold down the mouse, and drag and resize to make it smaller or larger.
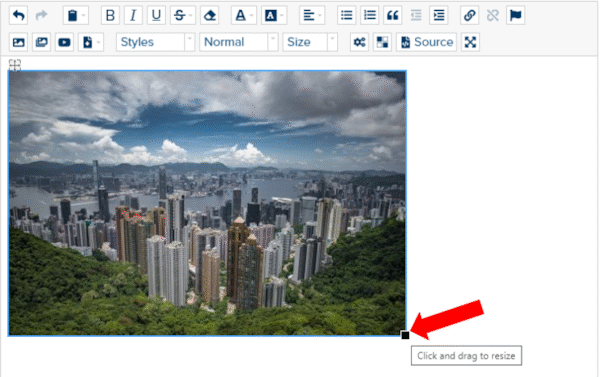
Fig. 9 - Resize image in HTML editor
Alignment
To make text wrap around the image, open the image properties and change the alignment to left or right (Fig. 10), depending on where you want the image to appear. If you choose align left, the text will wrap on the right side of the image. If you choose right, text will wrap on the left of the image.

Fig. 10 - Image alignment options
Margins
Margins allow you to add space around the image (Fig. 11). This is helpful when you align the image to the right or left and don’t want the text to touch the image.
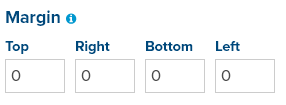
Fig. 11 - Image margin properties
Border
A border can be added to images if desired. To add a border, set the border width in pixels (Fig. 12). As soon as you provide a width value a border color field will appear. You can add any hexadecimal (HTML color codes) value.

Fig. 12 - Image border properties
Captioned
Setting the Captioned checkbox (Fig. 13) will change the image so that you can add a text caption directly under it (Fig. 14). This will change how the image is inserted into the html editor by wrapping it in a special figure tag. Once inserted you can edit the caption text like any other text in the html editor.
![]()
Fig. 13 - Image caption property
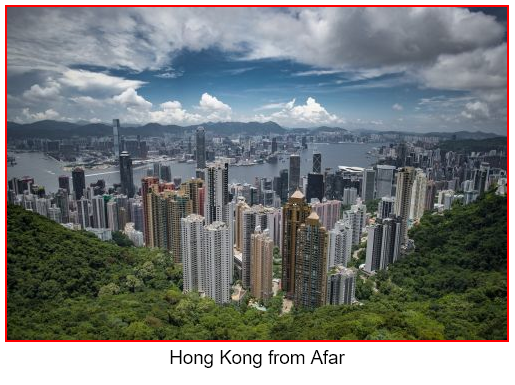
Fig. 14 - Center-aligned image with caption
Feedback?
Please fill out the form below with your feedback or any questions you may have after working through the "Inserting Images" lesson.