Trashing & Untrashing Objects ID: EBT-WWC-TRASH
In Marketpath CMS, when you want an item removed from your site you have to first move it to the Trash. The Trash is one step from being permanently purged.
There are three ways an item can be moved to the Trash. The first is by selecting multiple items in a list view and then clicking the Trash button (Fig. 1).
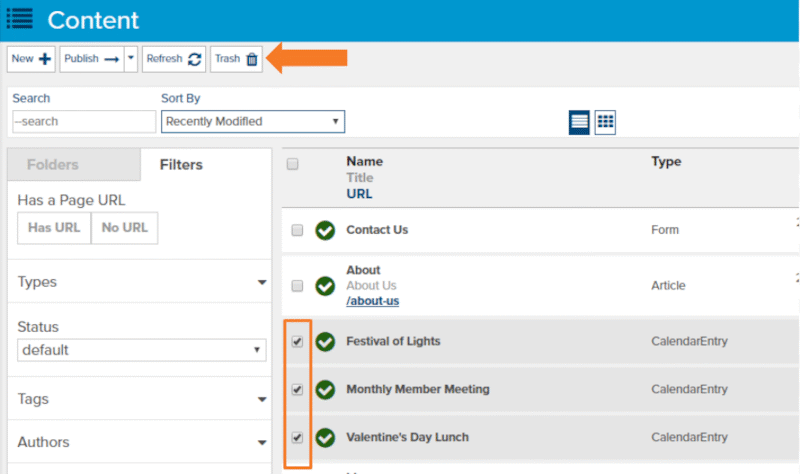
Fig. 1 - Selecting items and moving to the trash
Once you click the Trash button, you will be prompted to confirm you want to trash the selected items (Fig. 2). Review the list of items and click Yes if you want to proceed.
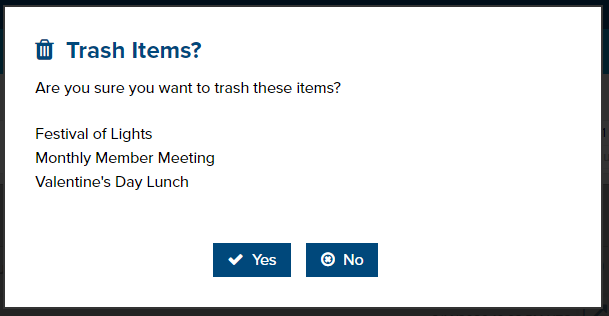
Fig. 2 - Trash items confirmation
You can also Trash an object directly from the Properties dialog by clicking the Trash button. This will also present you with a confirmation dialog (Fig. 3).

Fig. 3 - Trashing from Properties dialog
PLEASE NOTE: Trashed items are unpublished immediately from the Live site!
Cascading Trash
If you are trashing any type of parent object, or an object that contains child objects, then all of those items will also be trashed. For example, if you trash a Blog then all its child Blog Posts will also be trashed. Similarly, if you trash a Datastore then all its Datastore Items will be trashed. Each of these types will not issue a warning about also trashing child items so be careful doing this.
Folders, however, do issue a warning. When you trash a folder and it has subfolders or child items, you will see a confirmation dialog explaining that the folder has subfolders and child items (Fig. 4). You must click Trash All to proceed.
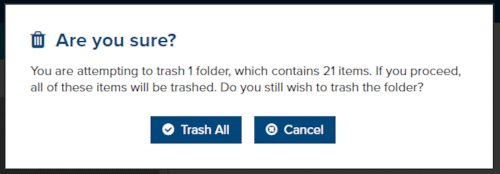
Fig. 4 - Trash Folder with child items confirmation
Untrashing Items
All items added to the Trash can be untrashed. To do this, go to Site -> Trash and the Trashed Objects dialog will open (Fig. 5).
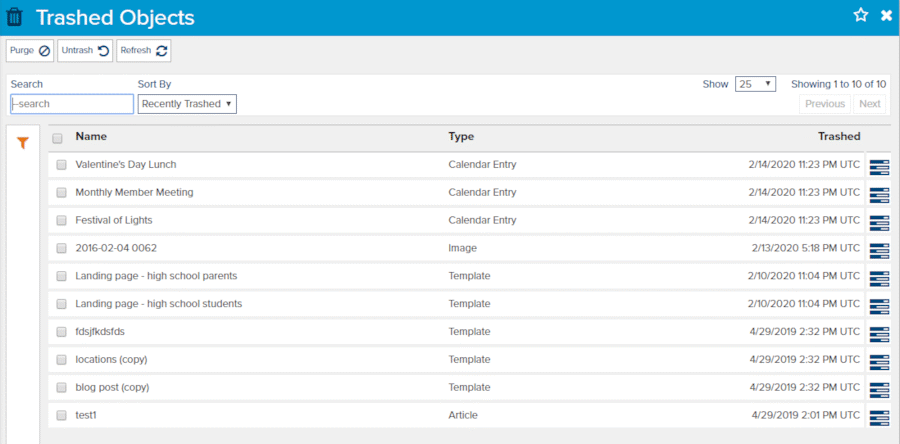
Fig. 5 - Trashed Objects dialog
Here you can select one or more items to Untrash or Purge. If you Untrash the objects theywill be immediately restored without a confirmation dialog. Purge is described later.
You can also click the Properties icon ![]() in this dialog and see a read-only version of the object (Fig. 6).
in this dialog and see a read-only version of the object (Fig. 6).
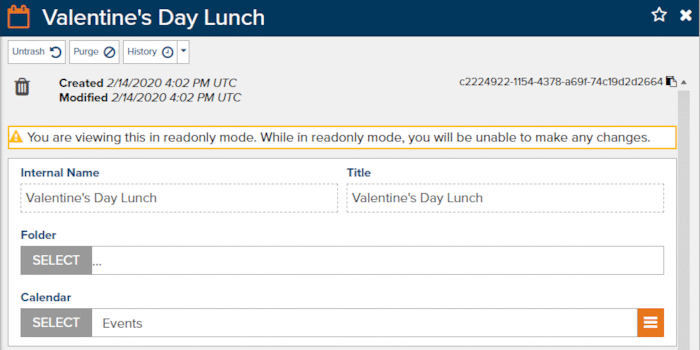
Fig. 6 - Trashed object read-only dialog
Here you can Untrash, Purge, or view the History or Versions of the object.
Purging the Trash
When you Purge items from the trash they will be removed permanently from the database, file storage, and the CDN. Purging items from the Trash will show a confirmation dialog (Fig. 7). Click Yes to permanently remove the items from the system.
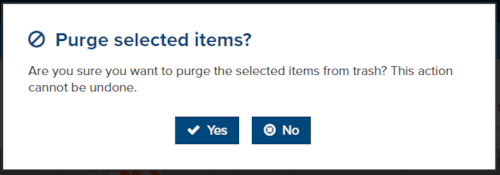
Figure 7 - Purge confirmation dialog
Feedback?
Please fill out the form below with your feedback or any questions you may have after working through the "Trashing & Untrashing Objects" lesson.