Working with Calendars ID: EBT-WWC-CAL
Calendars allow you to display events in a calendar view or a list on your website. To access your calendar go to Content -> Calendars and the Calendars list dialog will open. To access the Calendar Entries click the right-facing Browse button (Fig. 1).

Fig. 1 - Calendar list dialog designating the Browse button to see Calendar Entries
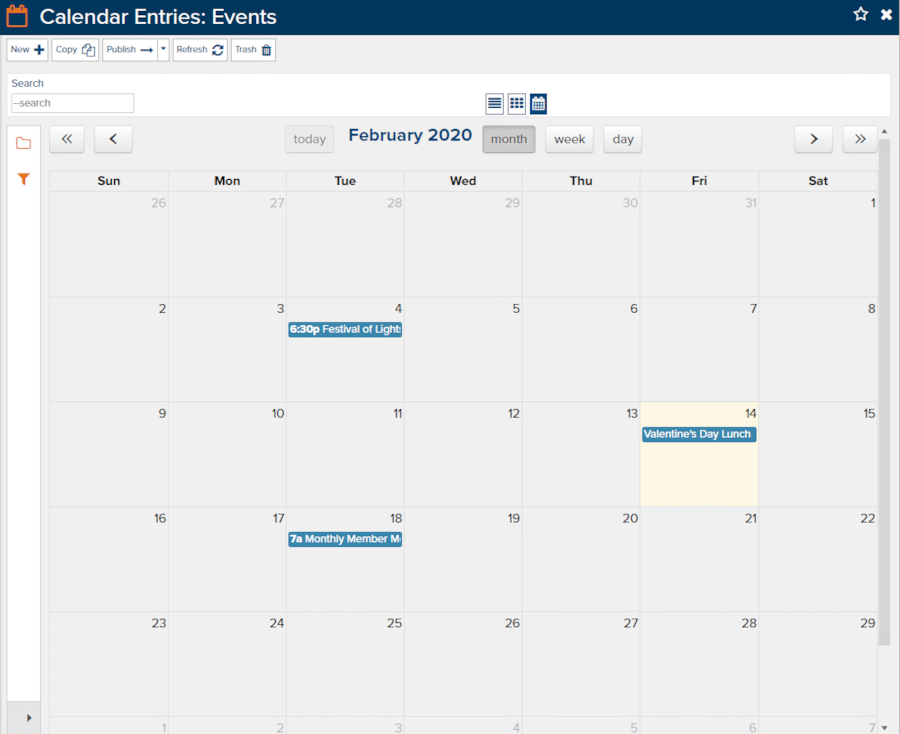
By default, the Calendar Entries dialog will open in the monthly calendar view (Fig. 2).

Fig. 2 - Calendar Entry list in month view
Views
There are a few navigational icons and actions to understand in this dialog that will help you find and add calendar entries more easily.
You can move from month to month by clicking the single right and left arrows or jump entire years by using the double right and left arrows (Fig. 3).
![]()
Fig. 3 - Buttons for moving from month to month or year to year
To get back to today’s date, click the today button (Fig. 4).
![]()
Fig. 4 - Today button
If you’re managing a lot of events you can change to a week view or day view (Fig. 5).

Fig. 5 - Month, week, or day view buttons
Creating New Calendar Entries
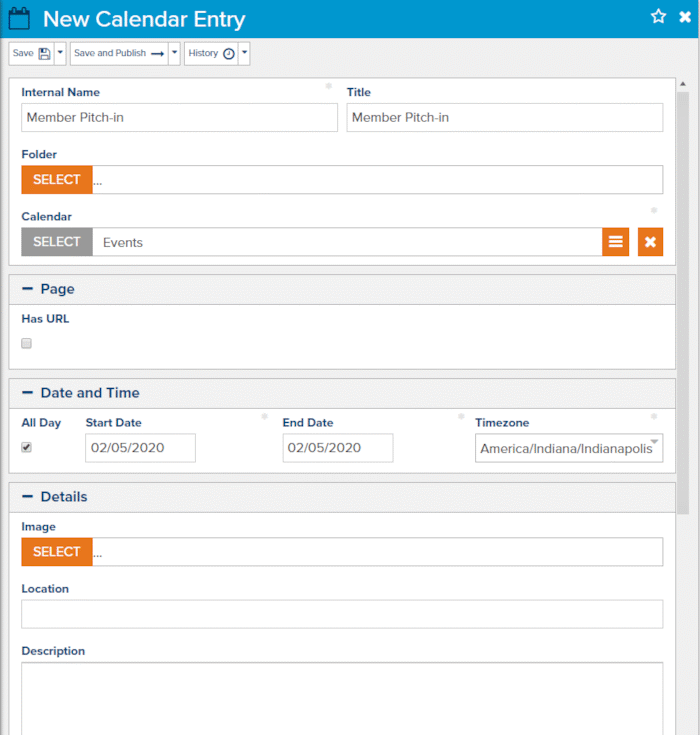
To create a new calendar entry you can click the New button in the Calendar Entry list dialog or you can click on a date in the calendar view. Clicking on a date will automatically set that date in the new entry dialog. The New Calendar Entry dialog will open for both methods (Fig. 6).

Fig. 6 - New Calendar Entry dialog
Give your Calendar Entry an Internal Name and a Title. The Title will be displayed on the website, whereas Internal Name is used within the Manage environment.
If you want your Calendar Event to have its own page with additional information, or even a form, be sure to select Has URL and provide the necessary details. There’s no need to create a separate Article or other object type for the event’s details. You can manage that all right here.
You’ll need to set the proper date and time for your event (Fig. 7). You can choose to have the event All Day by selecting that checkbox or you can provide a start and end time. The Timezone selection will be retained and used when the event is displayed on your website. This is different from the Blog Post and Article Post Date fields. By default, however, the time zone will be set to the parent Calendar’s default time zone.

Fig. 7 - Setting event Date and Time
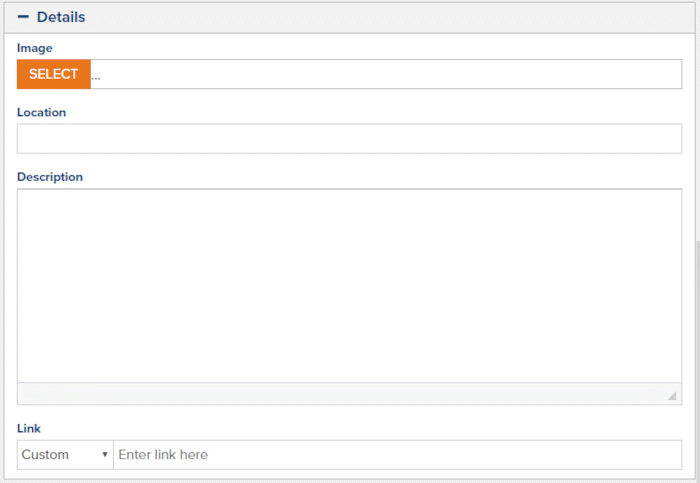
The next field group is Details (Fig. 8). You’ll need to consult with your developer to see if these fields are used on your Live site. Often, just the event Title, Date and Time are used for display on the website but calendars can vary greatly in how they’re implemented.

Fig. 8 - Calendar Entry Details group
The Link field, if implemented, allows you to specify an external link to a registration page or other event landing page.
Feedback?
Please fill out the form below with your feedback or any questions you may have after working through the "Working with Calendars" lesson.