Uploading & Managing Documents ID: EBT-WWM-DOC
Marketpath CMS provides a simple way to upload documents which are then automatically accessed through the Microsoft Azure content delivery network (CDN). This allows for incredibly fast download speeds.
Setting Content Disposition
Before uploading documents to your site, you’ll want to decide how you want those documents to be accessed within a browser. Documents can be accessed as an attachment for downloading or inline for immediate display by storing a value called Content-Disposition. This value is stored with each document when initially uploaded and, at this time, it cannot be changed. So be sure to set your preferred value before uploading any documents.
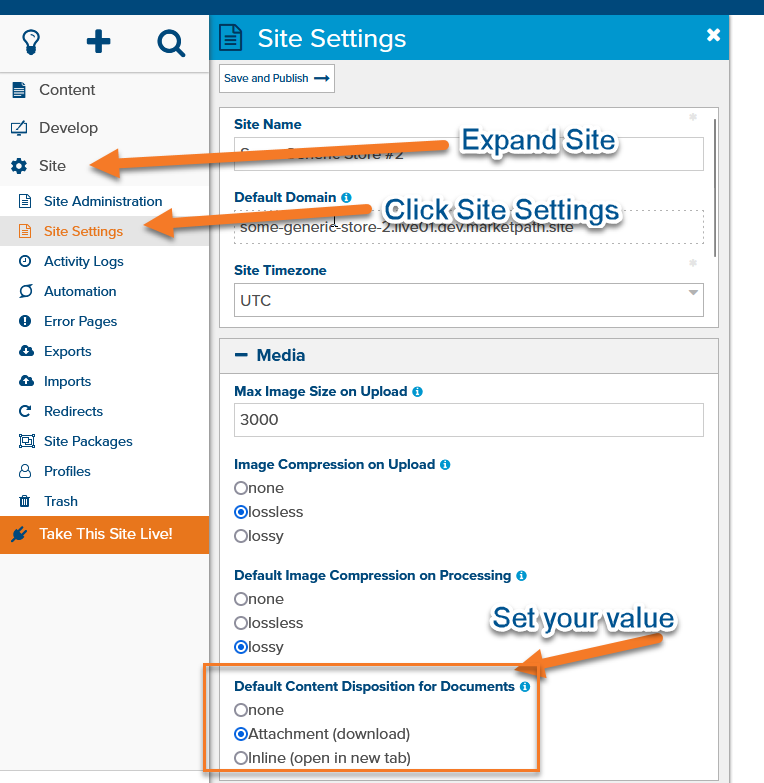
The content-disposition value is stored in Site -> Site Settings in the section called Default Content Disposition for Documents (Fig. 1 and Fig. 2). You can choose none, Attachment, or Inline.

Figure 1 - Getting to Default Content Disposition

Figure 2 - Setting content-disposition in Site Settings
Keep in mind that this setting is only a recommendation to web browsers. Any browser and any site visitor can override and ignore the content-disposition value as they see fit. So you can only influence the behavior. If most site visitors download the file as an attachment, which you set as your preferred value, but the occasional visitor has it open and display, there isn’t much you can do.
Attachment
Setting content-disposition to Attachment means the document will be downloaded but not opened.
Inline
Setting the content-disposition to Inline means the browser will attempt to open the document in a new tab.
Uploading Documents
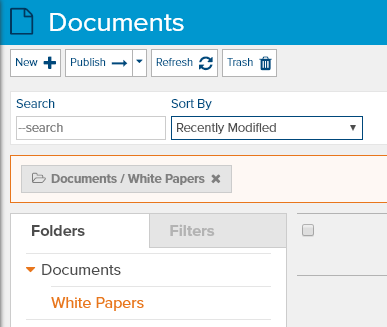
To upload documents go to Content -> Documents. Then select just one folder to use as the folder for the newly upload documents (Fig. 3).

Figure 3 - Select one folder before uploading
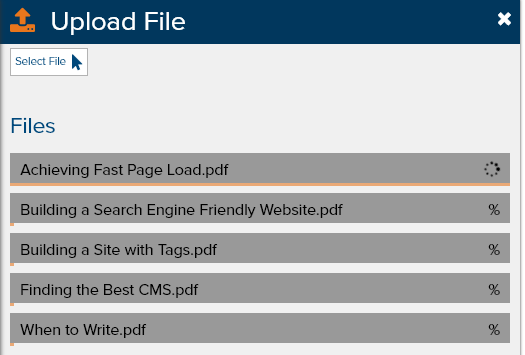
Click New and select the document or multiple documents you want to upload. Hold down CTRL while clicking each document to select more than one and click Open. The upload progress dialog will appear (Fig. 4)

Figure 4 - Upload progress dialog
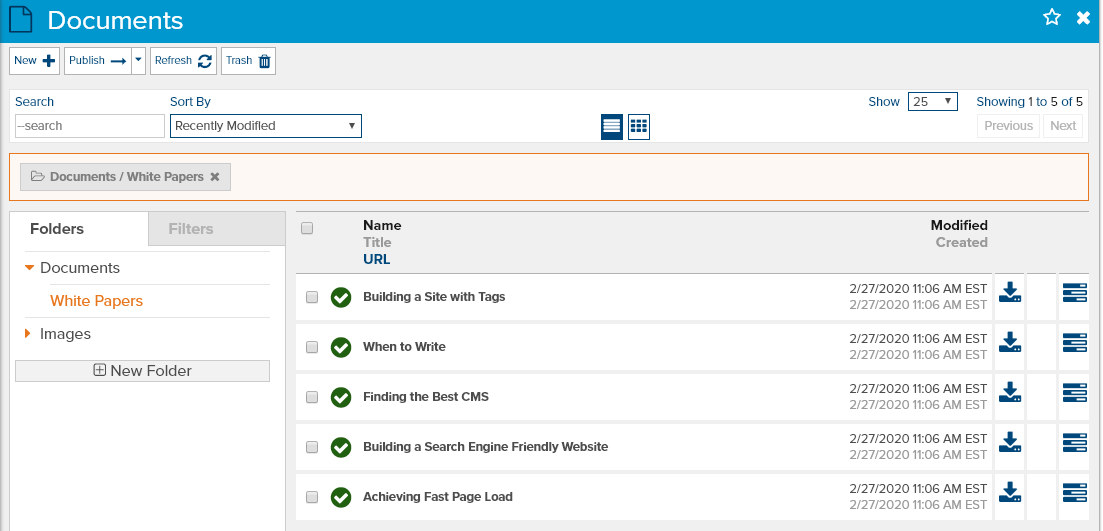
Once the upload has completed, your list of documents will be refreshed with the new documents (Fig. 5).

Figure 5 - Document list
Organizing Documents
Be sure to always select a folder for uploaded documents prior to uploading them. Otherwise, you will have to open the Properties dialog for each document, select the folder, and then save and publish. Or, if no folder is selected, you may end up with a vast collection of documents all in one folder or even without a folder making it difficult to find one when you need it.
Feedback?
Please fill out the form below with your feedback or any questions you may have after working through the "Uploading & Managing Documents" lesson.