Using Image Galleries ID: EBT-WWM-UIG
Marketpath CMS image galleries are used to display multiple images on a website in a visually enticing manner. There are nearly unlimited ways to display images so Marketpath CMS provides the Gallery and Gallery Item objects with standard fields found in most image gallery implementations.
Some site developers choose to use custom Datastores instead of a Gallery because they feel they have greater control over the gallery fields. If this is the case and you can’t find a gallery in the Galleries section, check Datastores and see if it resides there.
Creating a New Gallery
To create a new Gallery in Marketpath CMS, go to Content -> Galleries and click New. The New Gallery dialog will appear (Fig. 1).
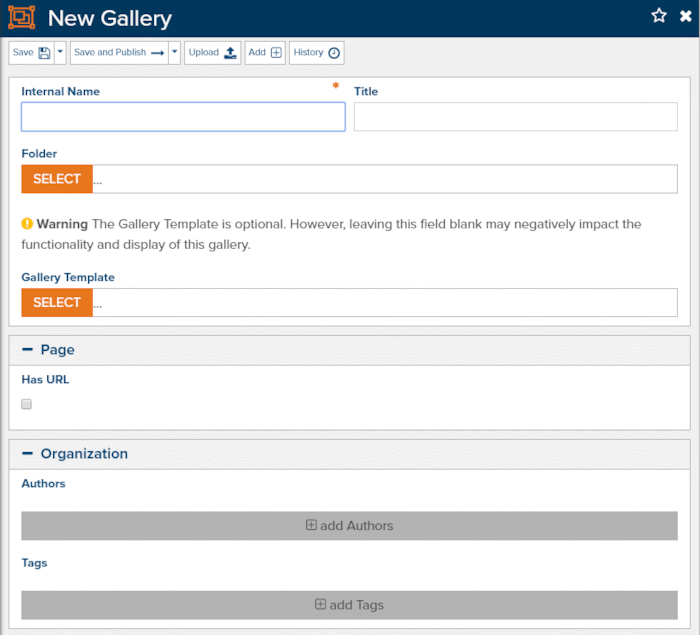
Figure 1 - New Image Gallery dialog
Give your gallery a Name, Title, and select a Gallery Template (if applicable). Once you’ve filled in the required fields click Save. After saving, you will have the ability to add new gallery items (images) (Fig. 2).
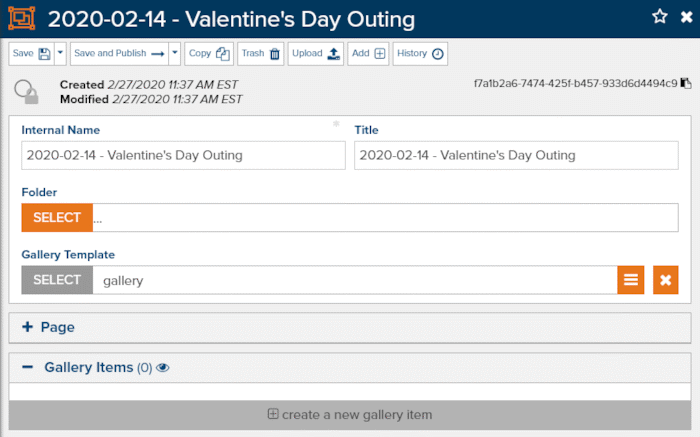
Figure 2 - A newly saved Gallery and gallery item options
Adding Gallery Items
There are three primary ways to add new Gallery Items (Fig. 3).
- Upload new images - this will upload new images and create the associated gallery items automatically for each.
- Add existing images - this will allow you to select one or more existing images and will then create a new gallery item for each.
- Create a new gallery item - This will allow you to create a new gallery item with the New Gallery Item dialog and manually associate an image with it.
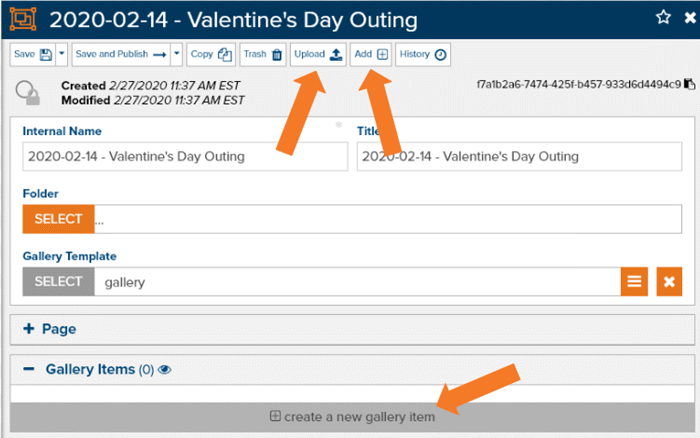
Figure 3 - Three methods to add new gallery items
Gallery Item Properties
Each gallery item has its own properties that can be updated (Fig. 4). First, each gallery item must have an Internal Name value. If you used the Upload or Add methods this value will be set to the image’s name. If you used the create a new gallery item method you will have to manually set it.
The fields in Display Settings may or may not be used in your gallery. Consult with your developer to determine which fields are used and required.
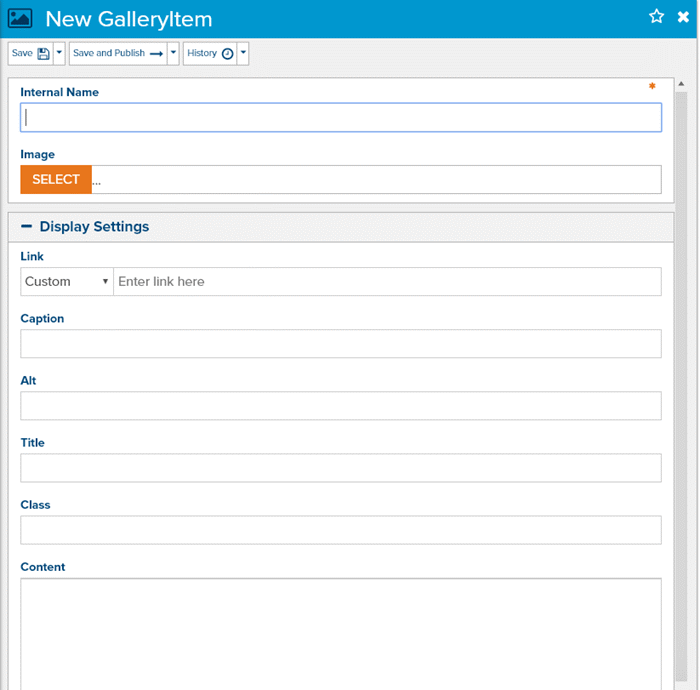
Figure 4 - Gallery Item properties
The Location group allows you to select a different gallery for this gallery item (Fig. 5). You can also change the Position Before value to an existing gallery item so this new gallery item is inserted before it in the full list of gallery items. The default is Position at end.

Figure 5 - Update the gallery item’s parent gallery and set its position
Moving Gallery Items
After adding one or more gallery items, you will see those appear in the Gallery Items list (Fig. 6). Here you can reposition items by clicking and dragging the move icon ![]() . You can remove (or trash) gallery items by clicking the red
. You can remove (or trash) gallery items by clicking the red ![]() .
.
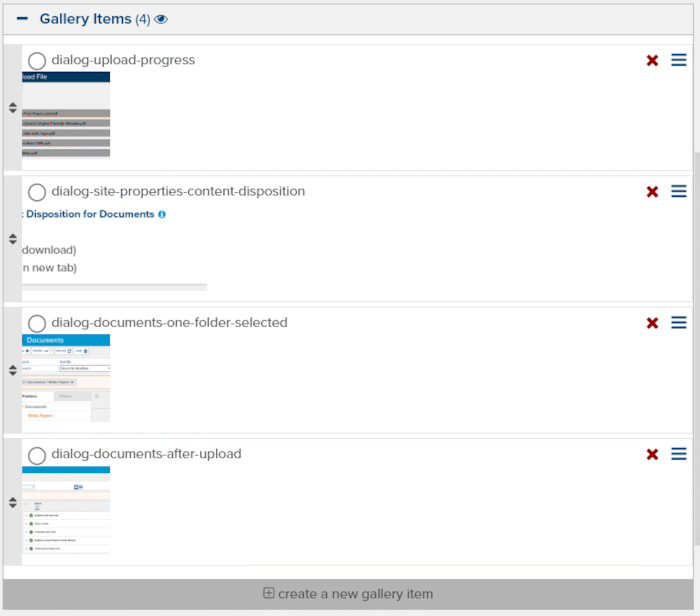
Figure 6 - Gallery Items list
Trashing Gallery Items
When you trash a gallery item by clicking the red ![]() in the Gallery Items list, you will only trash that gallery item. The associated image will not be trashed.
in the Gallery Items list, you will only trash that gallery item. The associated image will not be trashed.
Gallery Templates
If you do not have any gallery templates available on your site then contact your site developer, agency, or Marketpath support and you will be presented with gallery options that can be added. Remember, galleries come in all different shapes and sizes. Selecting a gallery will be based on your site design, target audience, and other factors.
Feedback?
Please fill out the form below with your feedback or any questions you may have after working through the "Using Image Galleries" lesson.