Site Setup ID: IWD-GS-SITE
Let's go ahead and get your development site setup so you can practice and see your changes as you learn each new skill. In the Marketpath CMS left side navigation, click My Dashboard to show the main Welcome dialog and then click Create a New Site (Fig. 1). Or click the Create a site button at the top left if you do not already have access to any sites.
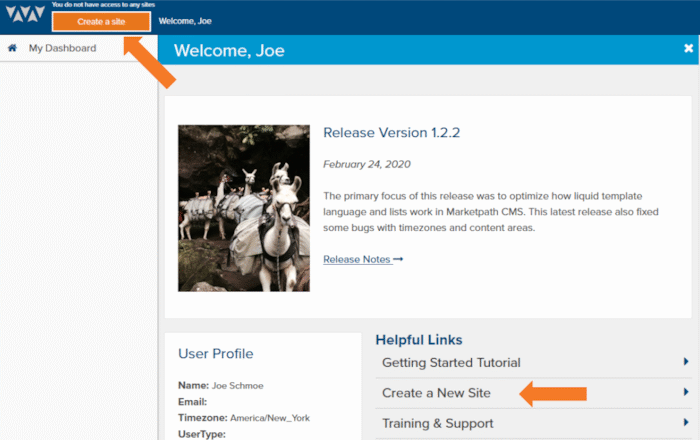
Figure 2 - Create a site actions
The New Site Wizard dialog will open (Fig. 2). Provide a name for this site, like "My practice site", and click the checkbox to agree to the terms and conditions. Again, practice and development sites are all free. You won't even have to put in payment or credit card information.
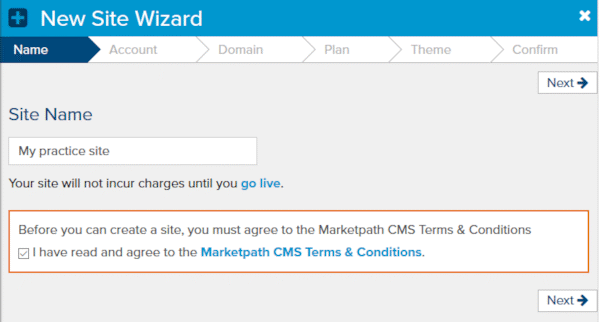
Figure 2 - New Site Wizard
In the next step, click Create a new Account (Fig. 3). In Marketpath CMS a site belongs to an account. Once you setup one account you can create as many development or practice sites you want under it.
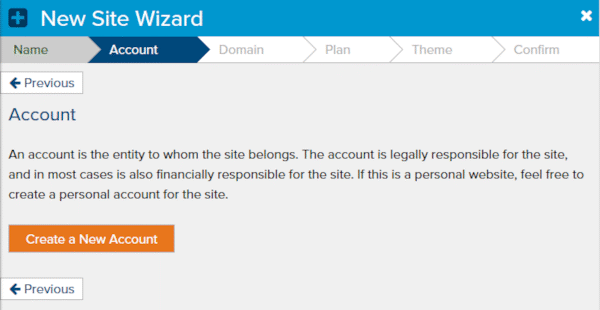
Figure 3 - New Site Wizard - select or create an account
In the New Account Wizard give your account a name and click Next (Fig. 4). You can provide any name you'd like or even make up a fake company name.
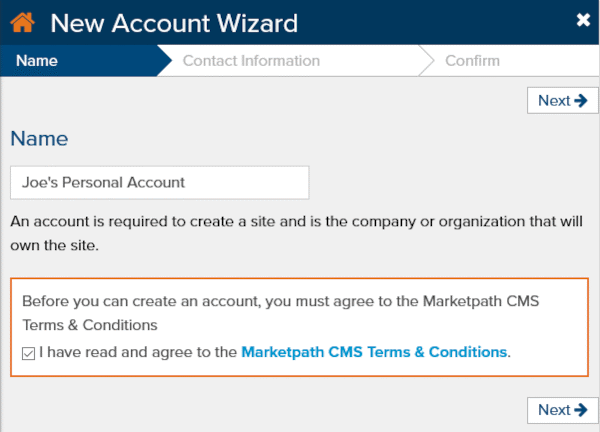
Figure 4 - New Account Wizard
Next, provide your address or make up an address and click Next (Fig. 5).
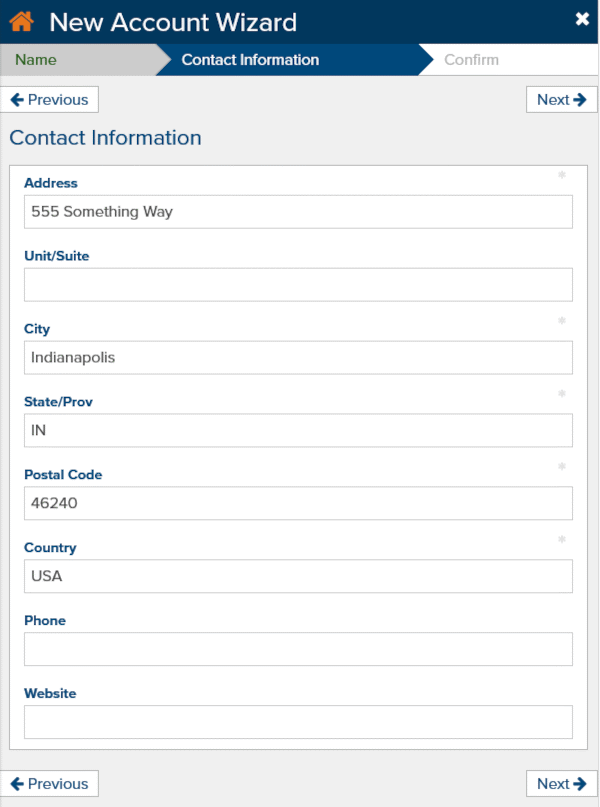
Figure 5 - New Account Wizard - address
Confirm your new account by clicking the Confirm Account button (Fig. 6).
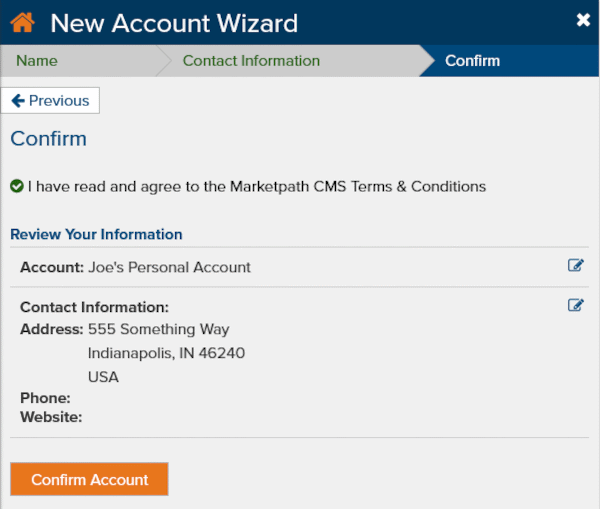
Figure 6 - New Account Wizard - confirm account
You will go back to the New Site Wizard and automatically advance to the domain screen (Fig. 7). Click the Add a New Domain button.
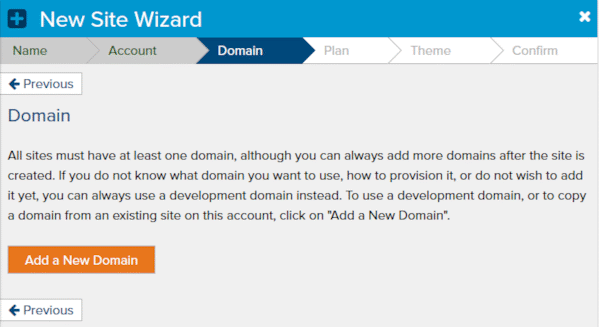
Figure 7 - New Site Wizard - domain
The New Domain dialog will open. Click Use a free development domain and then type in a unique name for your website (Fig. 8). The domain name can only include letters, numbers, dashes, or underscores. If the development domain is available the save button will become clickable and you'll see Available under the domain. If the domain is not available, you'll need to choose something else. Click Save when completed.
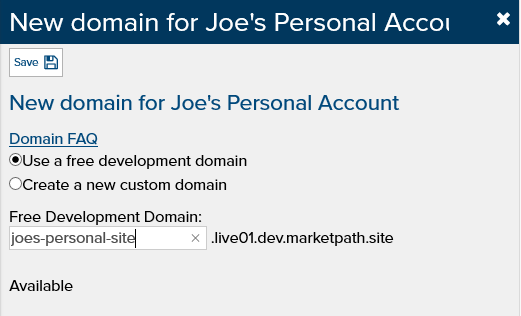
Figure 8 - New Domain dialog
You won't actually be accessing your website using this development domain. Instead, you'll be using a domain on our preview server. But we'll get to that later.
In the next step you'll need to select a plan. Since you're using our free preview environment, this step has no consequence for you, so just select the Starter plan by clicking on its name (Fig. 9). The checkboxes are only used for comparing plans.
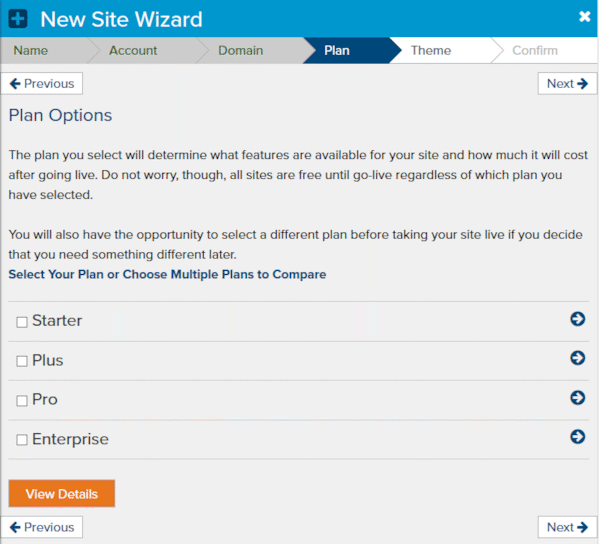
Figure 9 - New Site Wizard - select plan
In the next step click on the Intro to Website Development theme (Fig. 10). This will provide helpful assets in the new site.
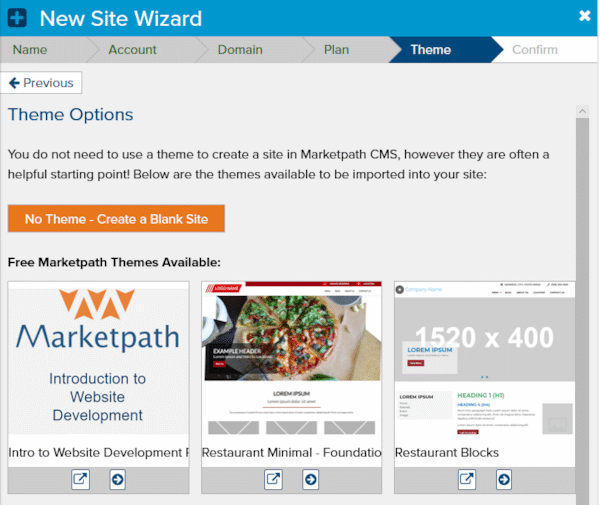
Figure 10 - New Site Wizard - Theme Options
Finally, review your site details and click Confirm Site (Fig 11). You'll see the Creating Site dialog appear and then the Site Created dialog (Fig. 12). Click OK and the browser will reload and open the new site.
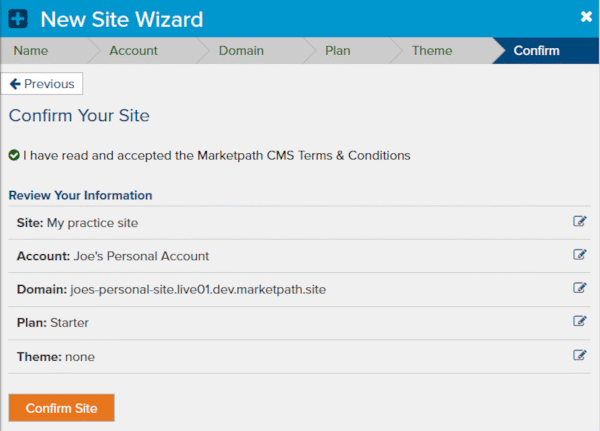
Figure 11 - New Site Wizard - Confirmation

Figure 12 - New site created confirmation
That's it! We know there are a lot of steps but trust us when we say that the alternatives are a lot more complicated.
In the next lesson you'll get to jump right into learning HTML, the foundational markup language used on every website.
Feedback?
Please fill out the form below with your feedback or any questions you may have after working through the "Site Setup" lesson.