Authentication & Authorization ID: PRFL-DEV-AUTH
Marketpath CMS Profiles require you to download authentication packages or to build your own custom authentication code. This is the most important part of Profiles because your approach to authentication and authorization has a direct impact on your ability to grant or deny access to content and resources on your site. Even more critical: it has a direct impact on the security of your site and of your users’ credentials.
Since packages may vary, we’ll focus on some basic authentication and authorization best practices.
Authenticate a Profile
Before authenticating a profile, you should consider what security measures are reasonable to take in order to prevent malicious abuse of profiles. In particular, consider how difficult it would be to perform a dictionary or brute force attack to compromise a profile. We will dig into security best practices later but it is something that you should begin thinking about immediately. And your security measures are something that you should check before authenticating a profile.
To authenticate a Profile user, you’ll use the auth login method below:
{% auth login request.post_params[“email”] request.post_params[“password”] %}
This method will grab the email and password from a posted form and pass them into the auth:login method. You can then test if the user logged in successfully and handle that condition appropriately. The code below will test if the login was successful and if not display an error message detailing why it failed.
{% unless auth.logged_in %}
    {{ auth.error_message }}
{% endunless %}
Another common check is to verify a profile has been authenticated and if not, redirect them to the login page. The following code, placed in your site’s header template, will perform this action.
{% unless profile.is_active %}
    {% redirect “/login” %}
{% endunless %}
Authorizing a Profile User
Authorizing content is a different story and depends on how you plan to implement a site. In its most simple form, content may simply be authorized for any logged in profile. For more advanced implementations, authorization typically works in conjunction with groups and/or roles defined in Datastores or select lists.
One scenario, shown below, is to use a Datastore as the container for a list of profile groups. The profile groups can be based on:
- organizational or departmental names (e.g. ABC Inc, Virtual Printing Company, or Marketing)
- types of users (e.g. Site Admins, Moderators, Managers, Guests)
- some other identifying criteria that fits your needs
Create a Datastore called Profile Groups and then create individual items for that datastore (fig 1). Don’t worry about creating custom fields for the datastore at this time.
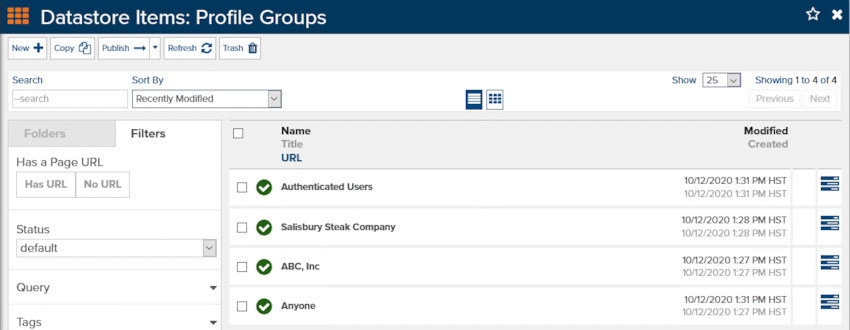
Figure 1 - Creating a Profile Groups datastore and datastore items
Add a Custom Profile Setting named “profile-groups” (fig 2). Select Datastore Item List as the Type and then go to Filters-> Datastores and add the Profile Groups datastore.
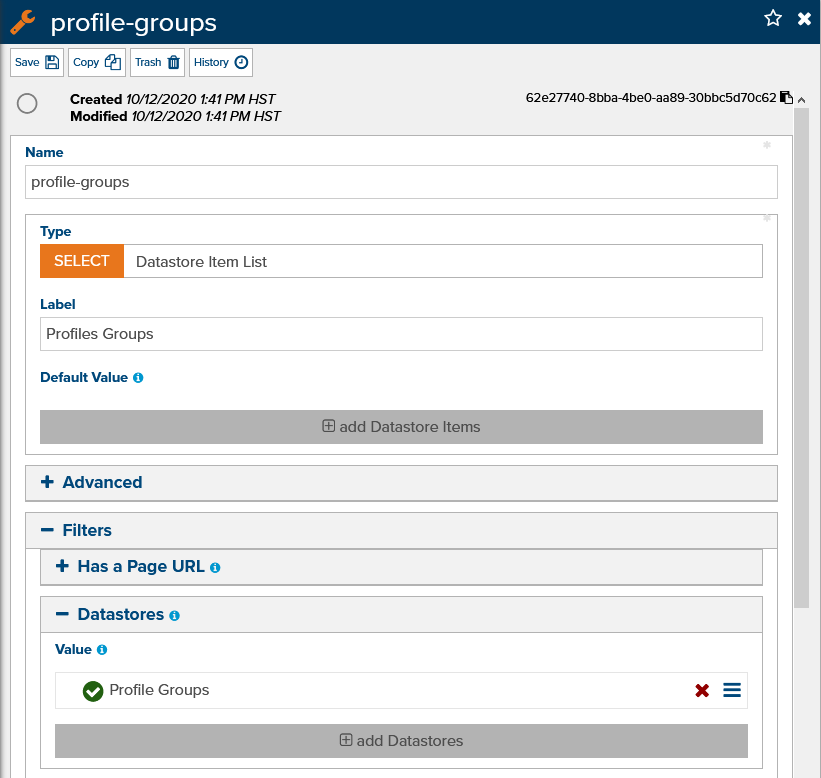
Figure 2 - Create a Custom Profile Setting called Profile Groups
Open your main header template, or master template if that’s what your site uses and add a Datastore Item List custom field type (fig. 3). Give it the name “Allowed Profile Groups”. You can ignore the Is Active field for now.
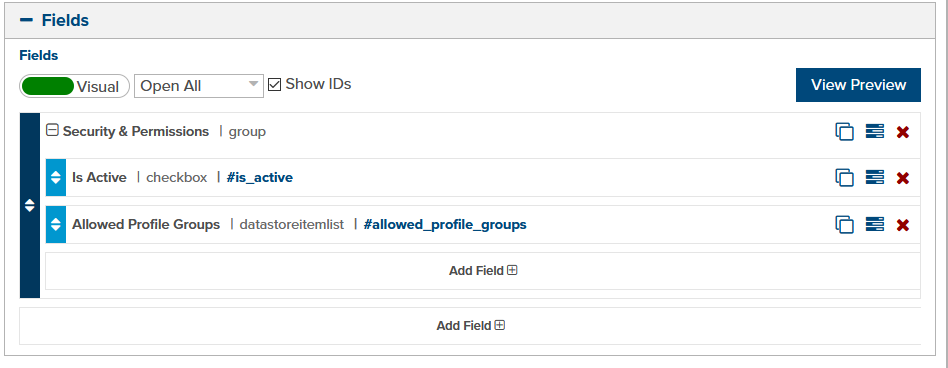
Figure 3 - Header template custom fields
Add the following Liquid code to the top of your header template.
{% var authorized = false %}
{% if entity.allowed_profile_groups.is_valid %}

    {% if profile.is_valid and profile.profile-groups.is_valid %}
            {% for group in profile.profile-groups %}
                {% if entity.allowed_profile_groups contains group %}
                    {% set authorized = true %}
                {% endif %}
            {% endfor %}
    {% endif %}

{% else %}
    {% set authorized = true %}
{% endif %}
{% unless authorized %}
    {% redirect “/login” %}
{% endunless %}
This code first checks if the entity (i.e. page) has been restricted to one or more profile groups. If not then the rest of the code will be skipped.
The code then checks if the Profile is logged in and if it has any of the profile groups required to access the content. If so, then that user is allowed to proceed. If there is no match then they will be redirected back to the login screen. You may choose to display alternate content such as an access denied message instead if the user is not authorized, or take any other appropriate action.
With those pieces in place, you’ll just need to set the Allowed Profile Groups for each entity or page (fig 4) and the assigned Profile Groups for each profile.
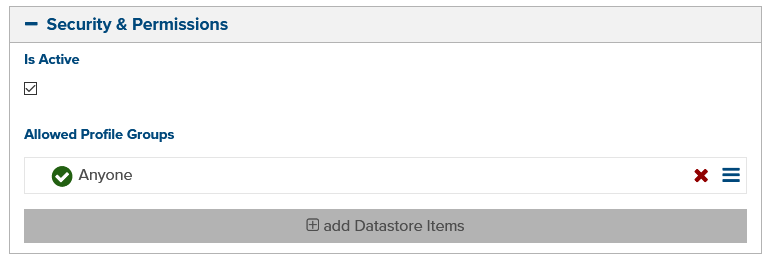
Figure 4 - Allowed Profile Groups for an entity
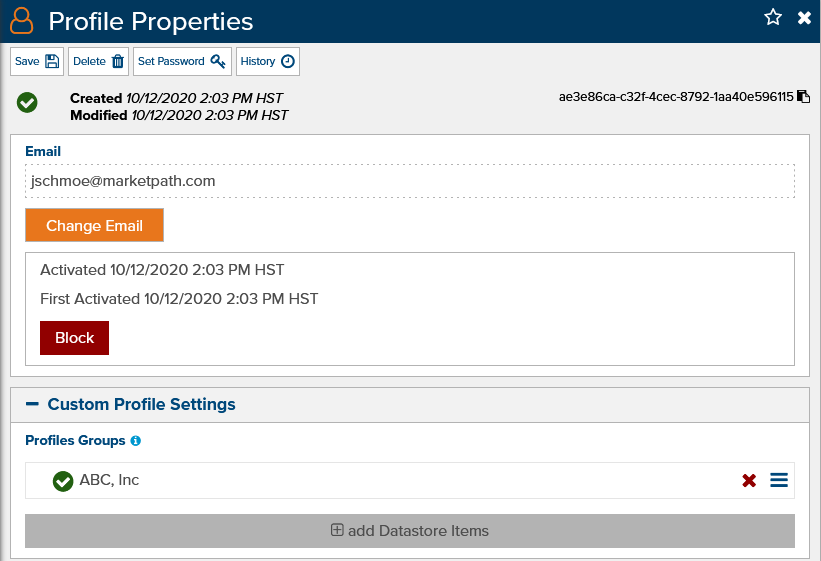
Figure 5 - Assigning Profile Groups to a Profile
Feedback?
Please fill out the form below with your feedback or any questions you may have after working through the "Authentication & Authorization" lesson.