Pre Go-Live: Site Domain Swap ID: DBT-SD-GLP
If you developed your site using a free development domain and have not yet added a custom domain then add one now. You can learn about this in the lesson for Adding a Custom Domain. If you developed your site strictly with the Preview Site and used your own custom domain for all pages then you can skip this entire lesson.
Once your custom domain is added, you'll need to perform a domain swap to switch from your development domain to the production domain. A domain swap updates all URL's for pages, menu items, etc. Default page URL's are also updated for entities.
To trigger a site domain swap, you'll need to open Site > Site Administration > Domains (fig. 1).
Fig. 1 - Site Settings domains
Click the new custom domain and click the Make Default button. This will ensure all new pages default to this domain. Close the site domain properties dialog.
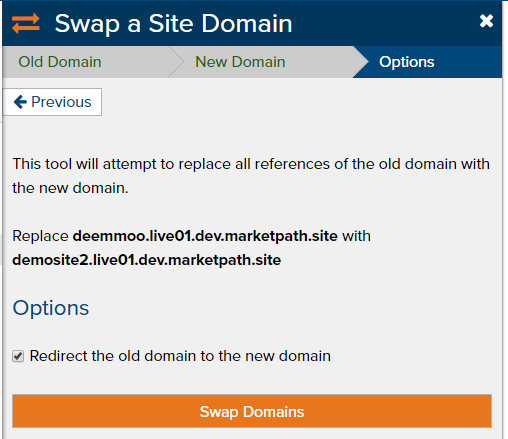
Next, click the old development domain and then click Swap. This will open the Swap a Site Domain dialog and will automatically advance to the New Domain step if you have more three or more regular domains setup for the site. If you only have two regular domains setup for the site (the dev domain and the custom domain) then you will be advanced to the final step (fig. 2).

Figure 2 - Swap a Site Domain - Step 3
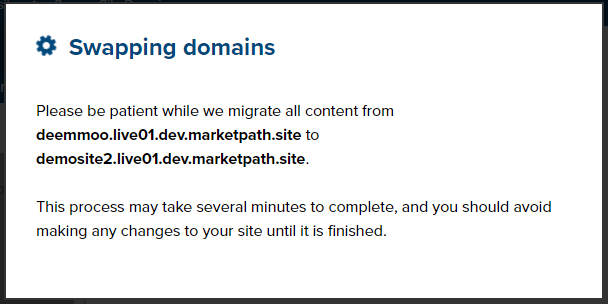
Click the checkbox next to Redirect the old domain to the new domain. Then click Swap Domains. You'll see the Swapping domains working dialog appear (fig. 2).

Figure 3 - Swapping domains dialog working
When the swap process has completed you will see the completed dialog (fig. 4).

Figure 4 - Site swap completed dialog
Everything currently published will be republished and updated with the new domain.
Feedback?
Please fill out the form below with your feedback or any questions you may have after working through the "Pre Go-Live: Site Domain Swap" lesson.