How to Create and Use a Datastore (pt. 2)
Overview
This article is a continuation of How to Create and Use a Datastore (pt. 1). This article will discuss a potential real-world scenario that illustrates how Datastores can be used to create and display data to your users.
Real-World Example: Sales Office Locations & Staff
To help illustrate how datastores can be used in a realistic scenario, I’ve created the following scenario. The goal is to display a list of Sales Offices and then all Sales Staff located at each office, along with their contact information.
To accomplish this goal, the following CMS items will be required:
- Two Datastores:
- Sales Office - The physical locations of a company as well as the basic contact information
- Sales Staff - The sales staff members along with their contact information
- Seven Datastore Items:
- Three sales offices (Cincinnati, Indianapolis, Los Angeles)
- Four sales staff (Westy McWesterson, Pablo Escobar, Mary Tyler, and Joe Schmo)
- One page Template:
- Sales Office Demo - This page will contain some basic information about the main company, the listing of sales offices along with the sales staff assigned to each.
- One Article:
- Sales Office Demo - The article that will contain all the content to drive the template
Datastores
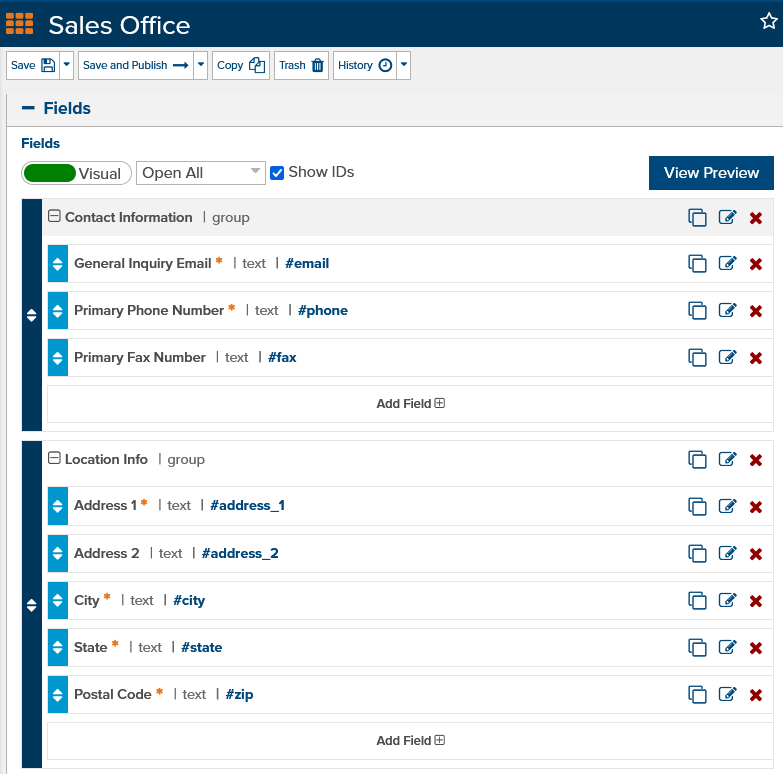
We can utilize some basic settings in the Sales Office datastore, such as contact information, address, and social network links. And we can add similar information to the Sales Staff datastore. Here are the settings I decided on for this example site:
A Sales Office includes basic contact and location information fields as seen below.
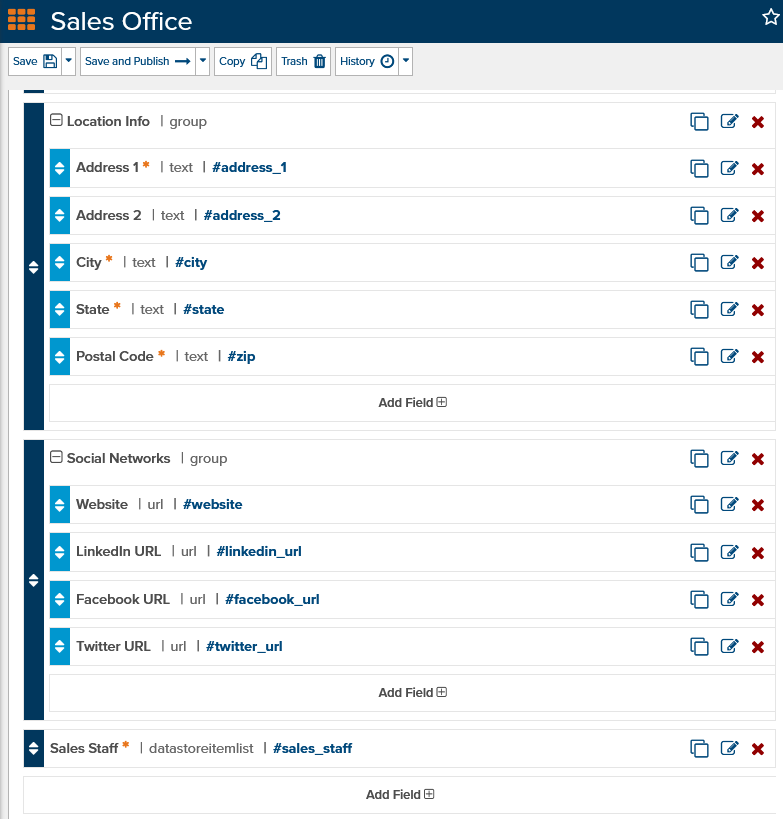
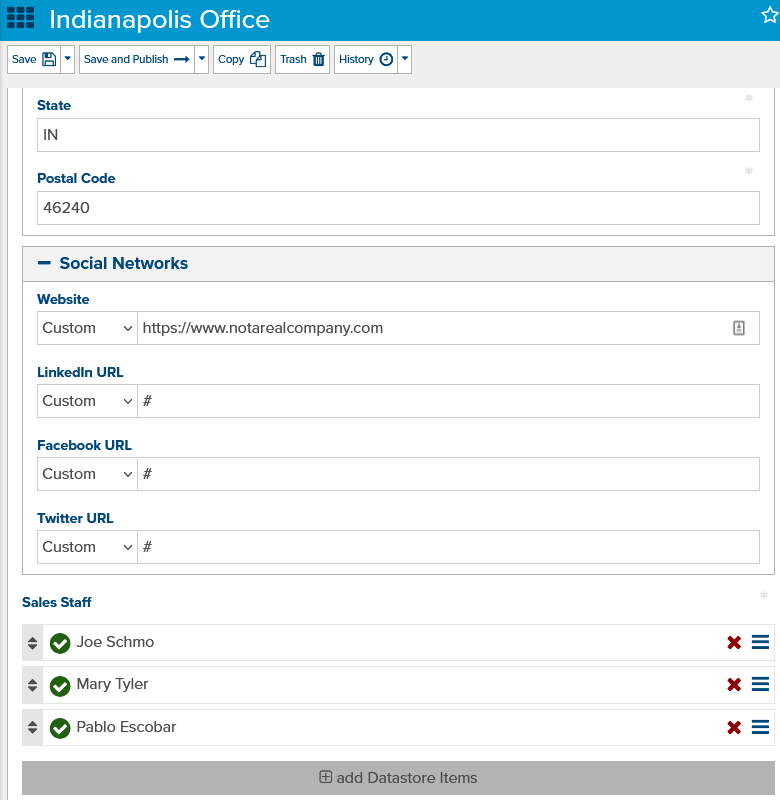
Then I added social network link fields and more importantly, a list of staff present at the office.
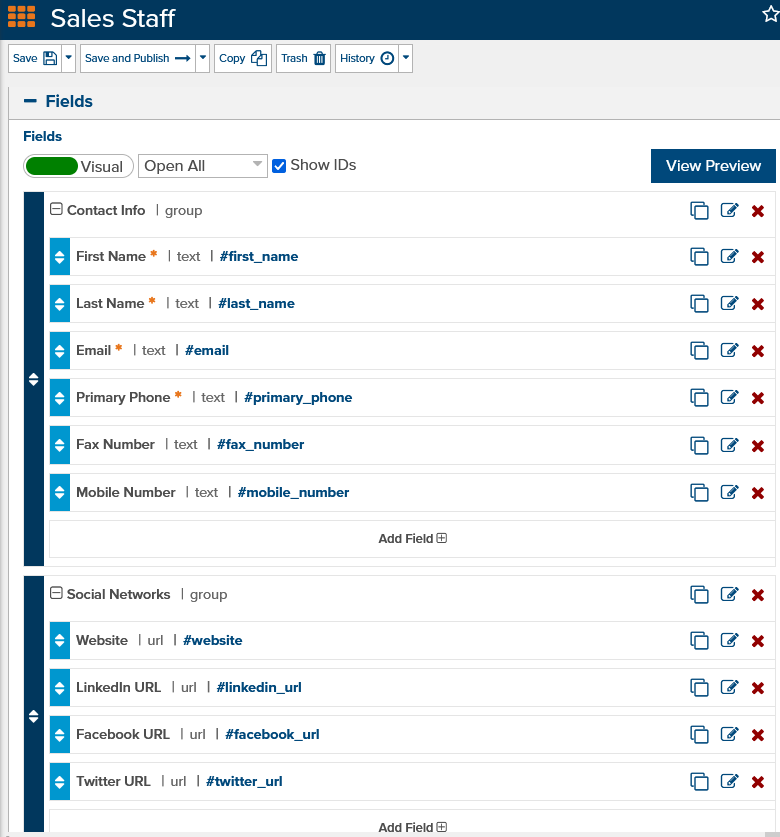
The Staff Datastore include basic contact and social media information.
Datastore Items
In this particular case, it probably makes more sense to start by creating Sales Staff members. The Sales Office themselves are being used to track membership, so it’s better to start by creating all the staff members (though this is not required).
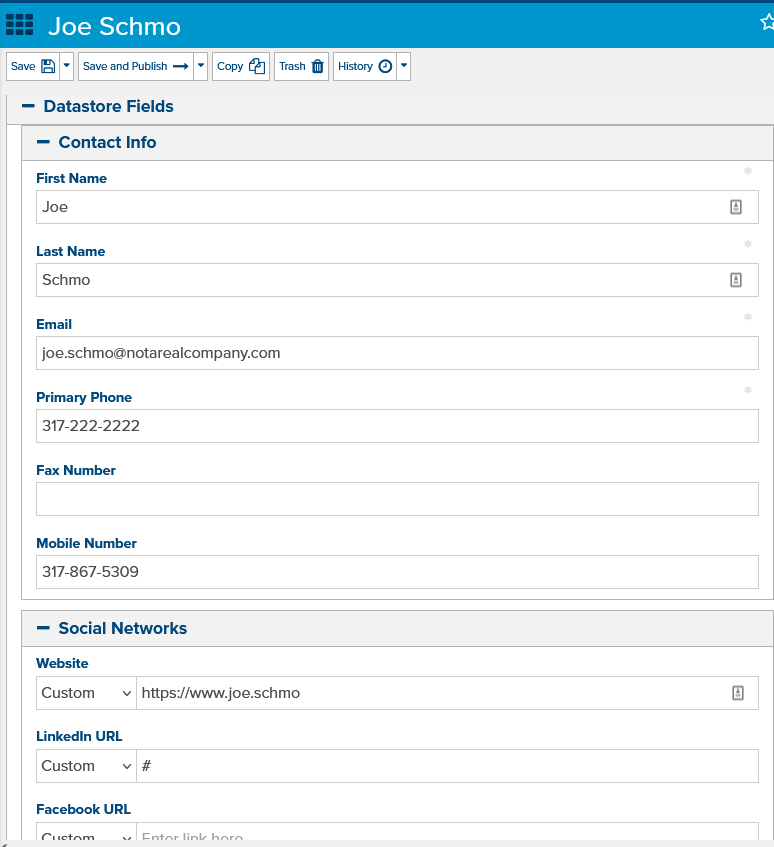
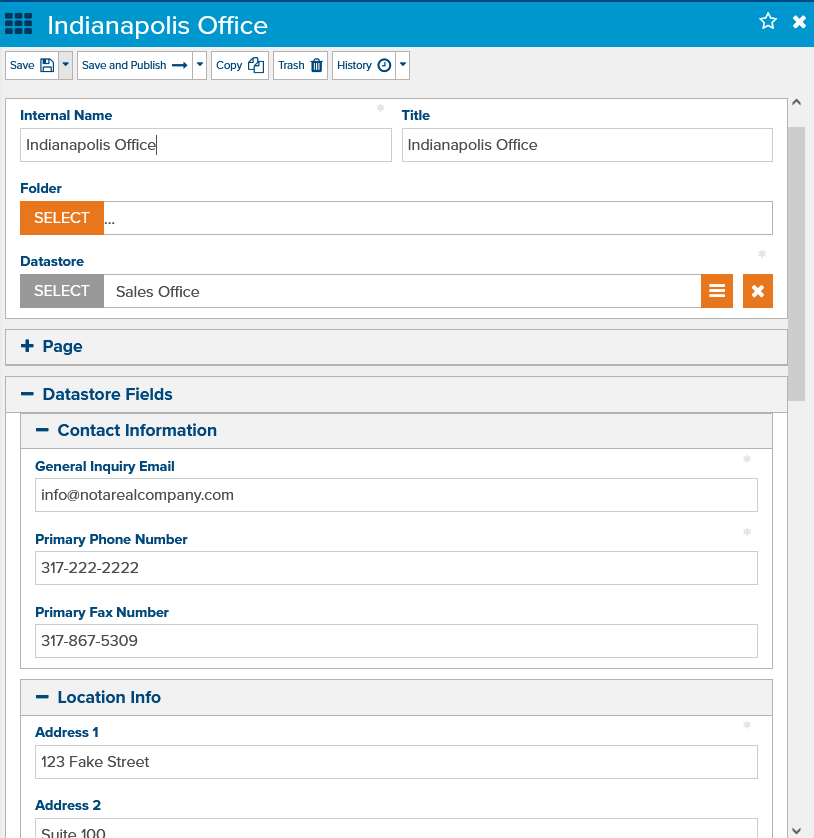
I added 4 different staff members by setting the various fields with garbage data, such as what is seen below in the first image. Once my staff members were created, I then created a new Sales Office and supplied values (seen in the second image below) and then I selected the appropriate staff members (third image below). This scenario assumes a Sales Staff member can be located at multiple Sales Offices.
In the image below, you can see the basic data that was entered for the new staff member. Demo data was used to illustrate how things might look.
Below, you can see the demo data for a new Sales Office.
Here, the Sales Staff members I created in the previous step are available for me to add to the list of staff members on this Sales Office.
All-in-all, I created 4 staff members and 3 sales offices, with varying numbers of staff members present in each. There is also a variety in the data supplied for each Datastore Item to show off how things can appear differently, depending on the data entered.
Page Template
For the sake of simplicity, the template content is all kept within the same page. Normally you’d make use of partial templates and CSS references in order to reduce code found on a single template. So, this quick example doesn’t meet normal development standards, but still illustrates the point.
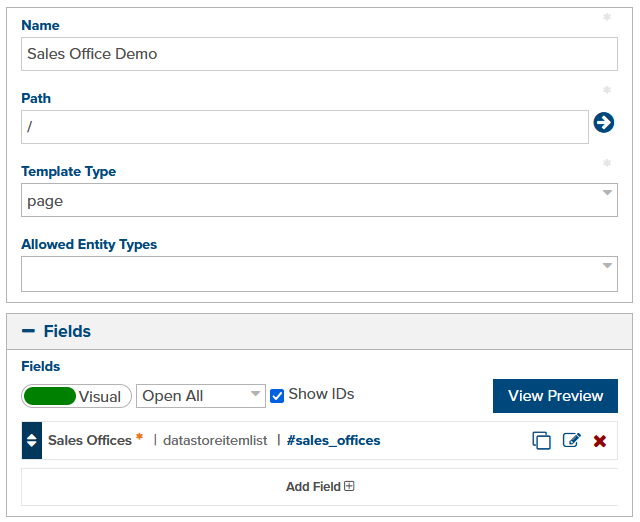
There is only one custom field that I added for this template, and it’s the list of sales offices (seen in first image below). There are numerous ways of outputting the Sales Offices to the page, but this was the option I selected. Some of the Liquid and HTML syntax can be seen in the second image below.
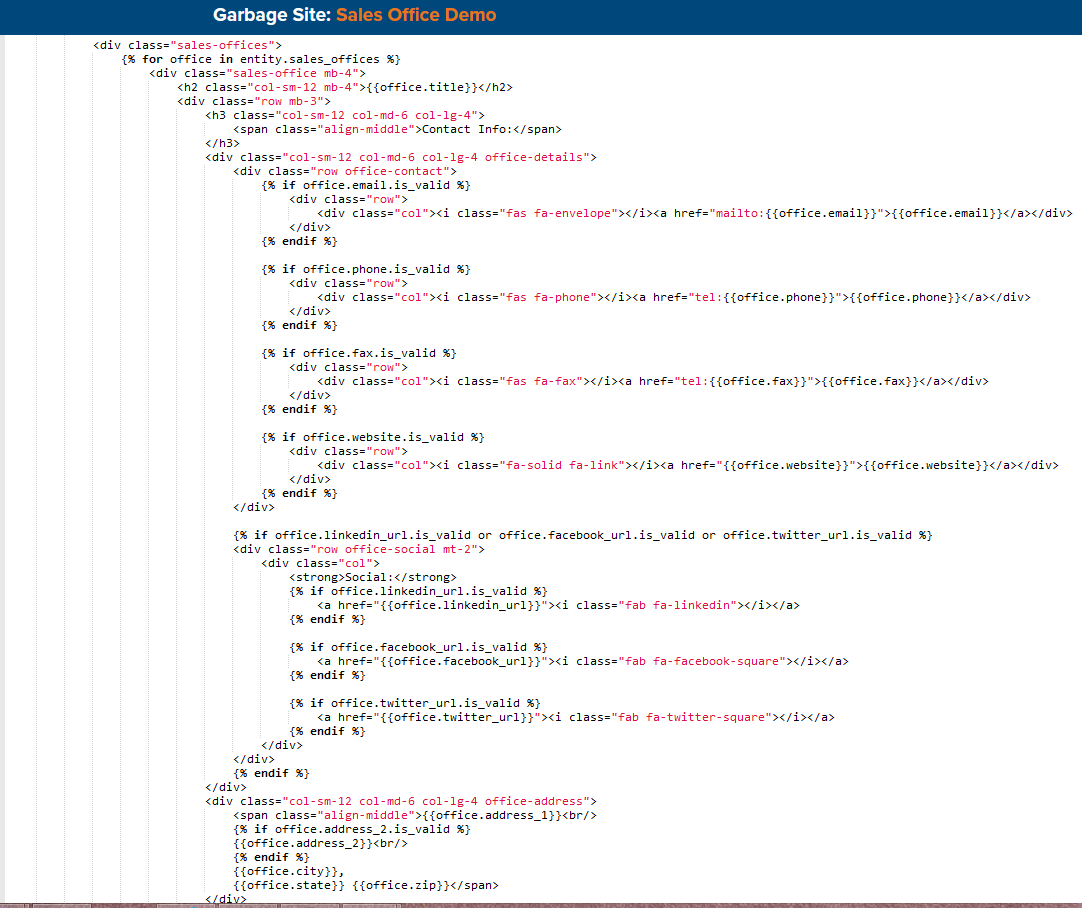
The bulk of the important display code can be seen here. It checks if the fields have a value, and if so displays them with icons (where appropriate). This output will vary based on your site design.
Article
In this simple example, all that was necessary to do in order to get the application to display was to first, select the Sales Office Demo Template (first image below), add some content to the Content box and then select the Sales Office entries (second image below). After saving and publishing the Article, you can click Preview to see the output.
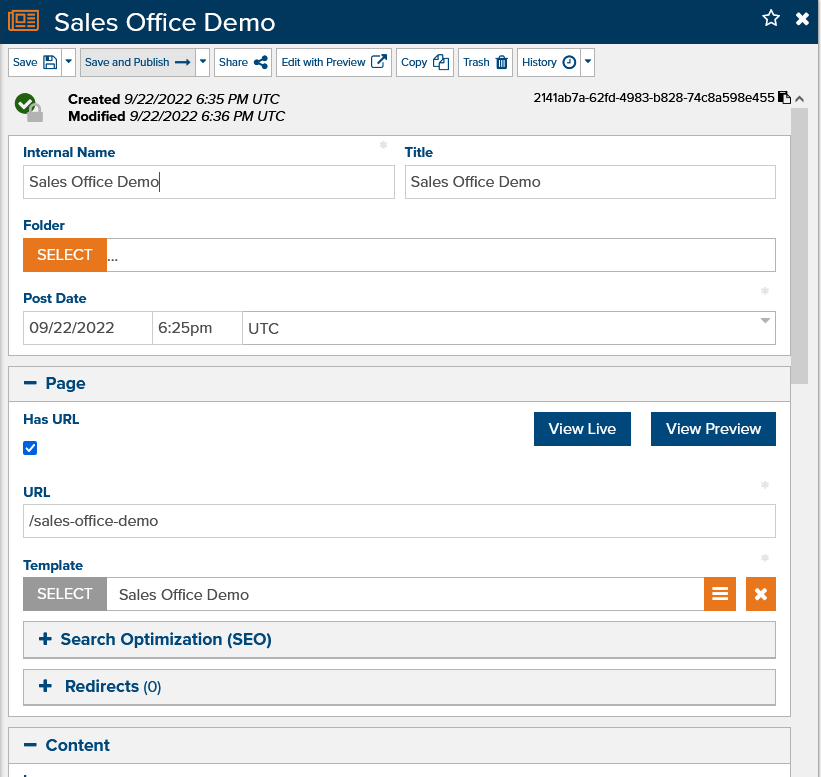
Select the Sales Office Demo template in order to grant us access to the custom fields and enable the data to be displayed as expected.
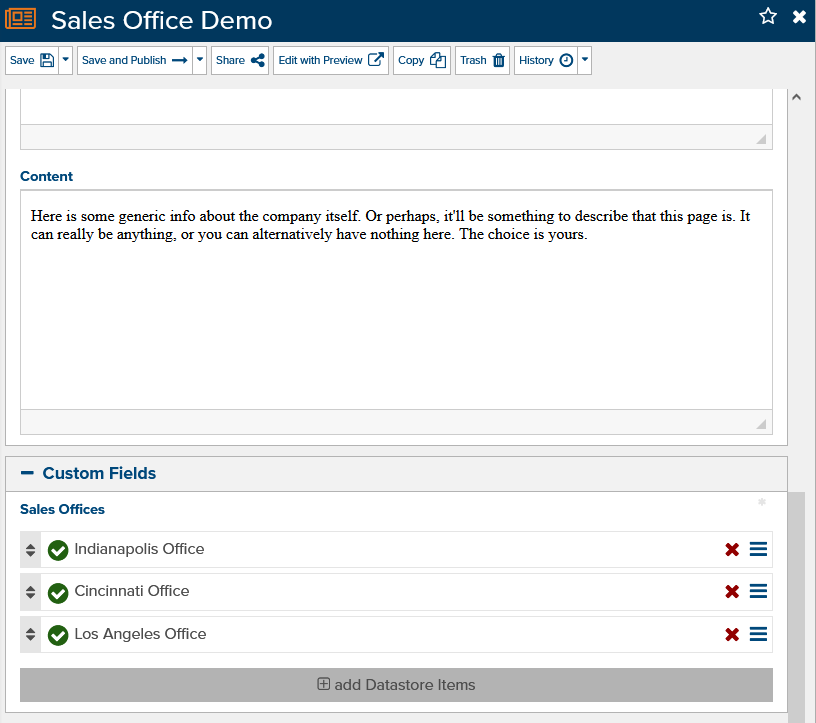
Add some basic content to the Content area (or don’t) and then select the Sale Office(s) in the order that you wish them to be displayed
Final Output
As you can see in the first and second images below, all 3 Sales Offices have been rendered to screen as well as all 4 Sales Staff members in various configurations. Depending on the data that was specified for each Datastore Item, different fields will be shown/hidden on the final output.
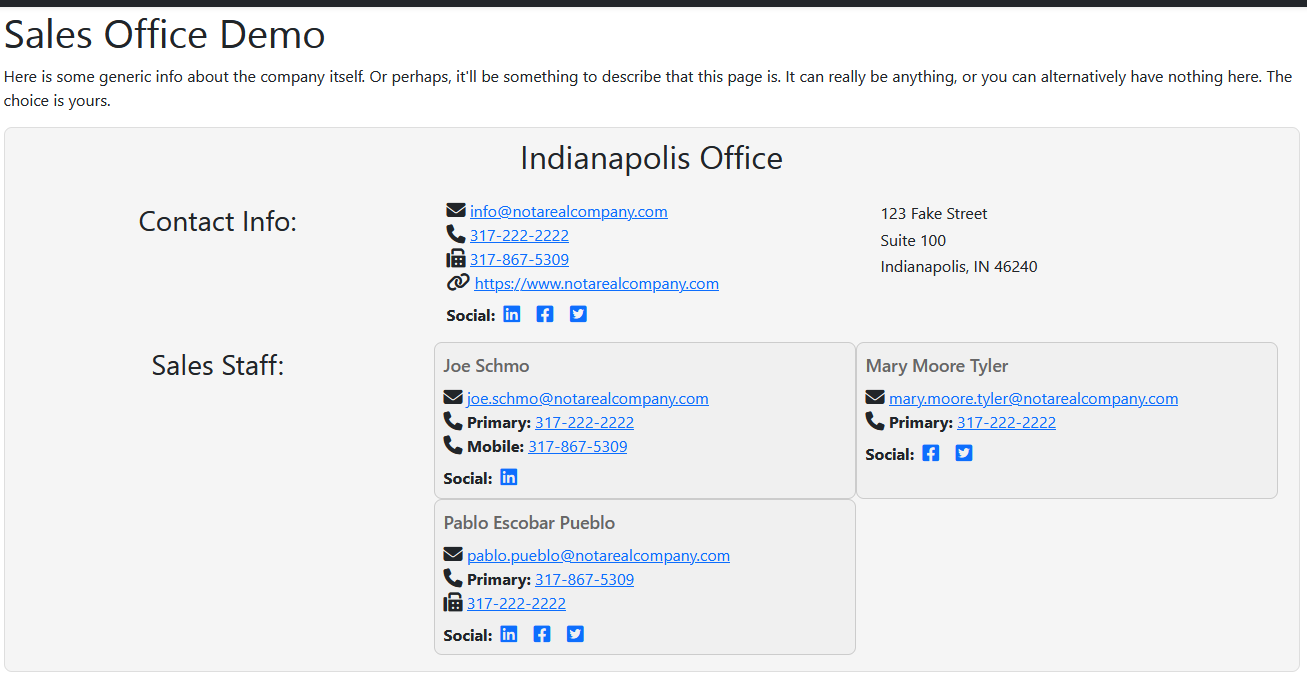
You can see that the phone numbers and social icons display differently for each Sales Staff member. You can also see all the information that was supplied for the Sales Office rendered out
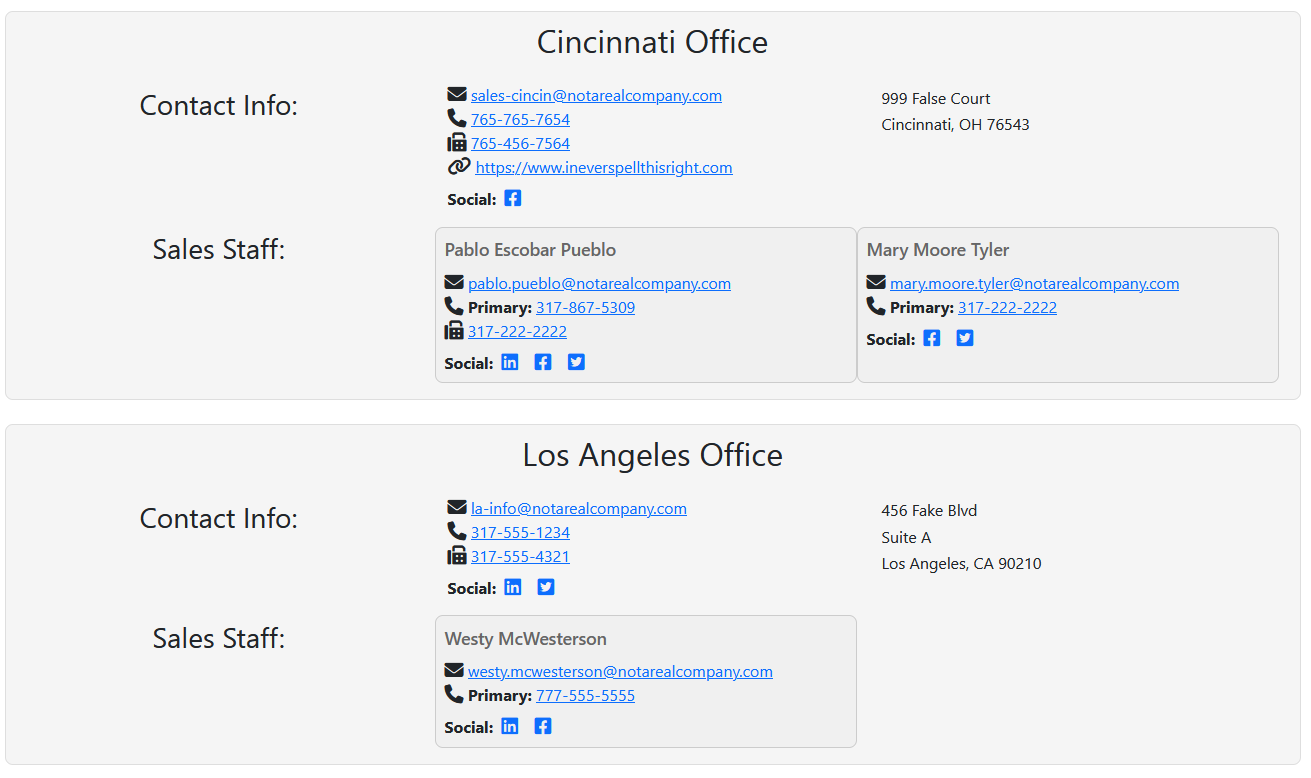
You can also see here that some of the same Sales Staff are present in different offices